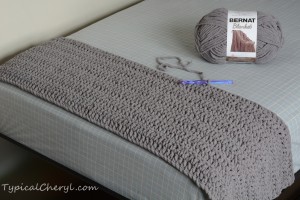
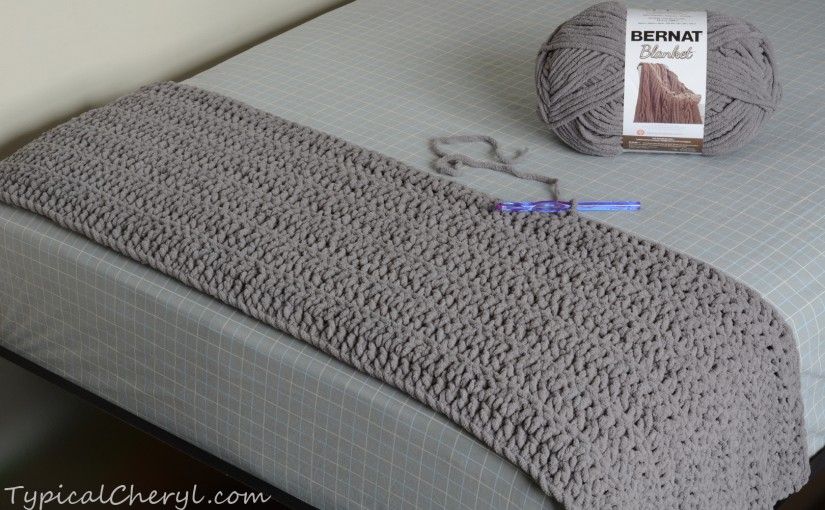
This is a fast and easy blanket to crochet. So you decide to make it. Then you wonder “How much yarn do I need?” That question could be the most complicated thing about making this blanket! Thankfully we can simplify things by looking at this WIP (work in progress) for a reference of how big the project will be with one ball of this incredibly soft and squishy, super bulky (6 gauge) weight yarn called Bernat Blanket yarn.
Normally figuring out how much yarn to buy for any project depends on MANY variables. Yarn thickness, hook size, stitch pattern, finished project size and more are all factors. So when I decided to crochet a blanket with this yarn for the first time I realized… I had no clue! Would 2 balls be enough? Or do I need 10? Of course, sometimes you just want to know how much money you are going to spend on the project before you get started. Hopefully this will be helpful.
This yarn is 100% polyester and reminds me of a strand fleece material. It is also machine washable and dryable with delicate and low heat settings recommended.
 The beginning of this blanket is shown on a twin size mattress. It measures 50 inches in width and 12 inches in height for 12 rows. (I made it less than half way on row 13 so it is not counted in the height.) In order to make a blanket that is 6 foot tall (my goal) you will need 6 balls. This is for the 10.5 oz / 300 g size skein that is approximately 258 yards or 234 m. It is pretty awesome that the math is so simple on this!
Note: the Bernat Baby Blanket yarn is the same weight, but the there is only about 72 yards in a ball, so if you would like to use a color that is only available in the Baby Blanket yarn you will need 3 times as many skeins. As described above that would be 18 balls of Bernat Baby Blanket yarn.
This would be a great project for anyone – even a crochet beginner who is just learning. It will make an impressive completed project to share too. Give it as a gift or snuggle up in it yourself. It is pretty irresistible! You can easily work on it while you watch TV because it is repetitive and works up quite fast with a large hook (9.0 MM/US M-13 hook) and this super bulky yarn. After a while it can even keep you warm as you work! 🙂 It is so simple there is no pattern needed! If you want to make one like this, the details are below.
Materials:
Bernat Blanket Yarn (Dark Gray seen here) 6 Balls for a 50 inch by 72 inch blanket to cover a twin size bed
9.0 MM/US M hook
Tapestry Needle to weave in ends
Gauge:
The dimensions I give to approximate yarn needs are based on 7 stitches and 4 rows equaling 4” x 4”
Method: (Too simple to be called a pattern in US Crochet terms)
Chain 88
Turn. Begin in the third chain from the hook double crochet (DC) across.
Chain 2 counts as first DC.
Warning! Do not place a stitch in the first stitch from the previous row or your edges will not be straight. Can you guess how I know? How many rows do you think I had to pull out to fix this? Now you won’t need to!
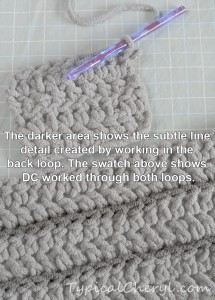
 DC in the remaining stitches working in the back loop only. Working in the back loop creates the line detail between rows. If you prefer, you can work in both loops for a more traditional DC look instead. See the photos for clarification of where to place your stitch if you want to work in the back loop and a visual comparison so you can see the difference between these two different ways of working this blanket with this yarn.
You will work this blanket horizontally, so continue until you reach your desired length.
Right now I am planning to also add a single crochet border around the entire blanket to finish it.
Hopefully this will be a warm, cozy, usable keepsake gift for my son when it is done. It has a current, chunky, subtle boyish (or manly) style. It is also super soft! The decision I have to make now is whether I should change colors so the finished blanket has thick stripes or keep it monochromatic. To make stripes I will pull out the partial row and start a new color with a new row. Let me know what you think in the comments below.
Join my email list for more, tips, tricks, projects and inspiration.
