 In April 2016 I had the privilege of teaching my methods and tips for lighting glass items on a dark background to a full room of talented photographers at the CanAm Photo Expo in Buffalo, NY.
Thank you to everyone who was there to support me! Hopefully everyone learned something valuable as I shared how I create my images of glass on a black or dark background.
Why “Typical Cheryl?”
Later during the Expo when I shared the link to this blog, I was asked “How did you get that name?” It is a great question! I talk about that here.
Before starting this blog, I thought a lot about the topic. The first choice was photography. It is an interest and passion. It is challenging, exciting and I enjoy sharing what I discover with others who are interested. I share my work, ideas and information to hopefully inspire you to try it yourself.
Although I love photography, something was holding me back. The truth is, sometimes I find photography totally and completely FRUSTRATING!
Insight
Sometimes you (and I) just need to take a break from our passion, the activity we enjoy most, because we start to HATE it. Are you with me?
Taking breaks from photography was something I was doing. However, without the insight and understanding of why I needed to take a break, there was a lot of doubt. The inevitable slumps or projects that just wouldn’t work out the way I saw them in my head would cause me to question if I should just sell my camera and focus on being a better person… {sigh.} Dramatic enough?
Then I read this article by Elizabeth Gilbert on Oprah.com discussing the importance of Curiosities.
Now I see these “curiosities” as interests. These interests are the things that fill my days when I can’t (or don’t want to) work on my photography. When these other interests or facets of my life go well, it makes everything easier. It gives me energy and enthusiasm to pick up my camera again. These are the other topics that are important to me.
- Parenting: Don’t get me wrong. I am not saying I like photography more than my kids! I love my boys more than anything in this world. And sometimes the journey through our day is thoroughly exhausting. I think about their safety, future and whether I am doing everything I can to ensure they enjoy a long, healthy, responsible and successful life. I often study parenting techniques and philosophies to be the best Mommy possible.
- Crochet: is something else I spend a lot of time doing and love the satisfaction of making things with my hands.
- Recipes: Trying and finding new and delicious recipes is a part of my life everyday too. After all, we all need to eat!
- Green Solutions: I also get (perhaps strangely) excited when I find new and better ways to clean or replace chemical cleaning concoctions with simpler, more “green” solutions.
- Reading: Of course, reading is important when you are interested in learning!
I was really having a hard time choosing just one topic.
Then I realized there is one element that holds all these things together: creativity.
Creativity to find solutions. Creativity to try something new. Creativity to do things differently.
And that is why I decided I wanted to “Share Creativity” here.
Now I hope that makes sense to you – my fellow photographers!
Lighting Glass – Presentation Notes:
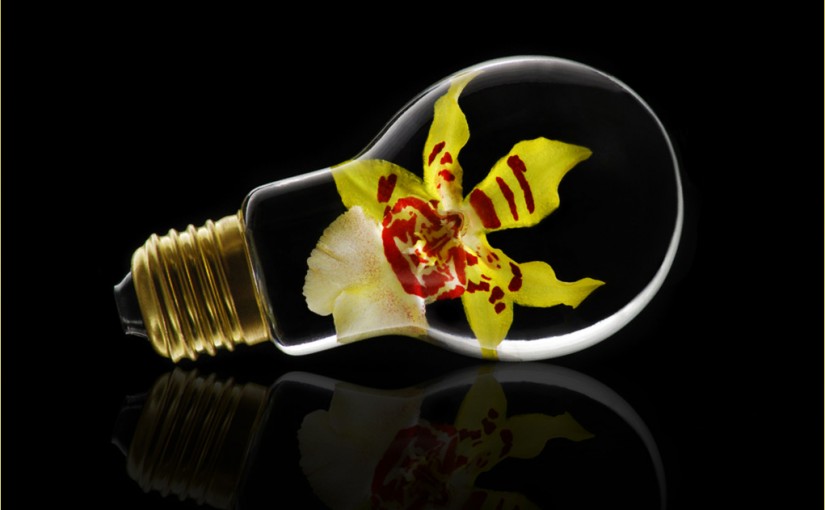
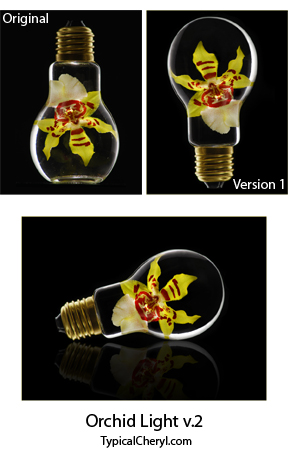
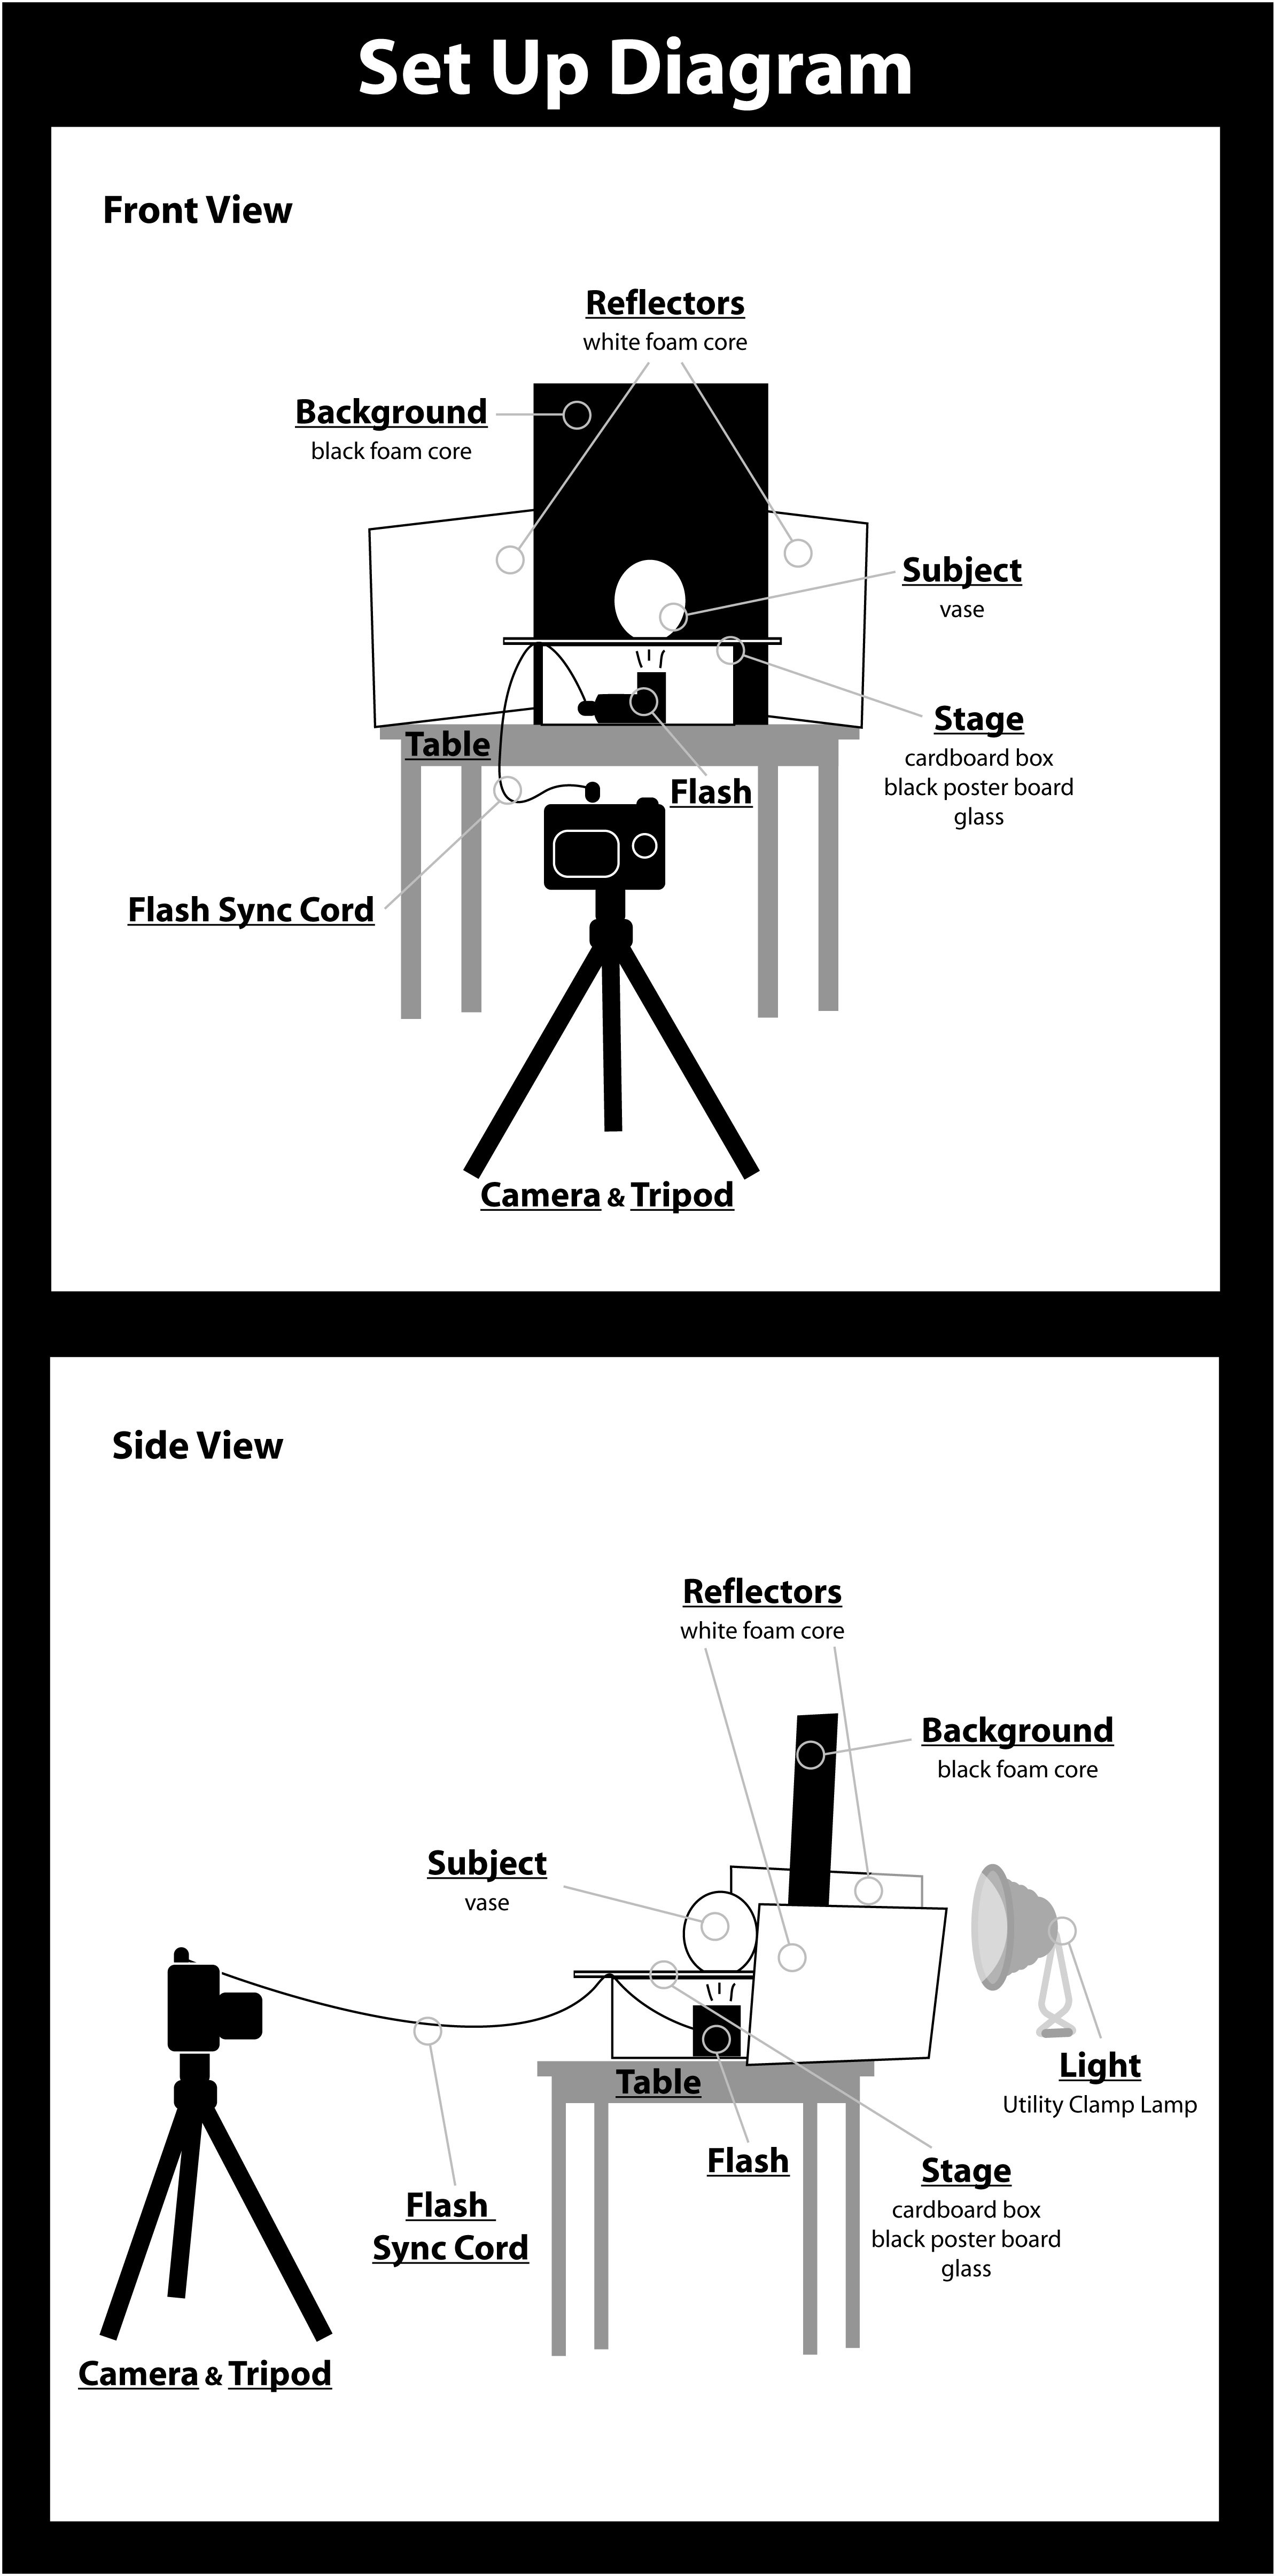
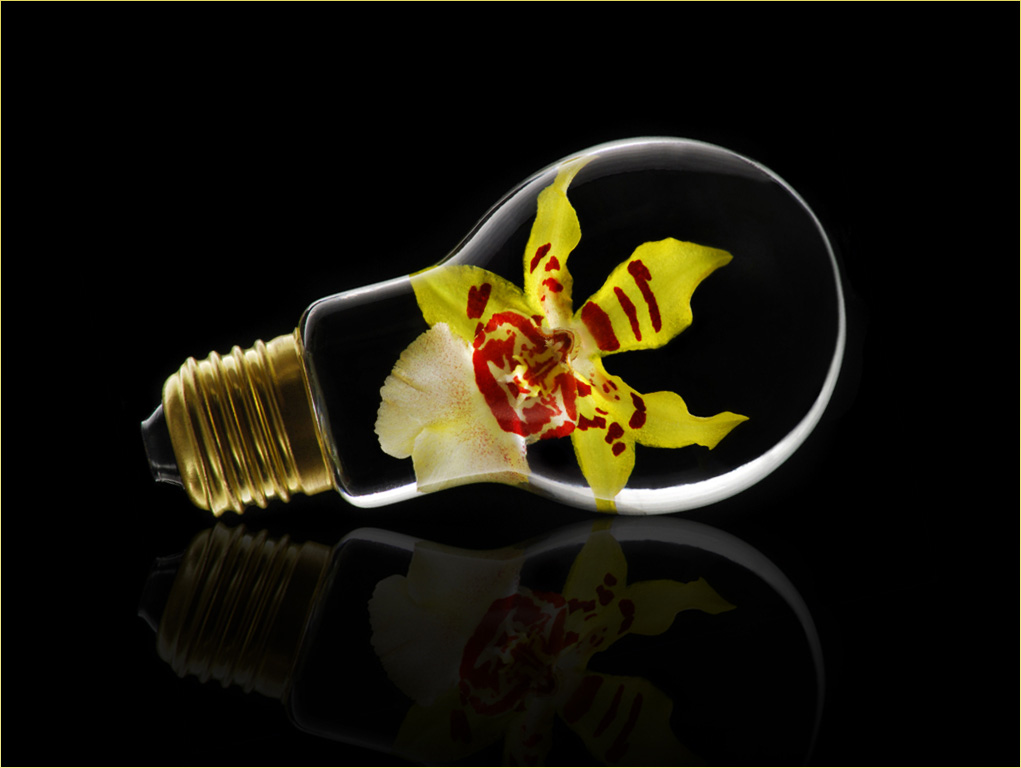
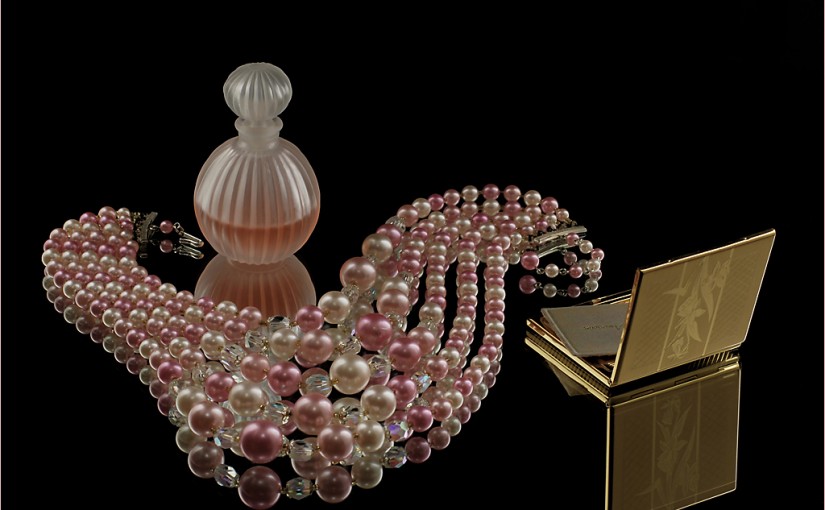
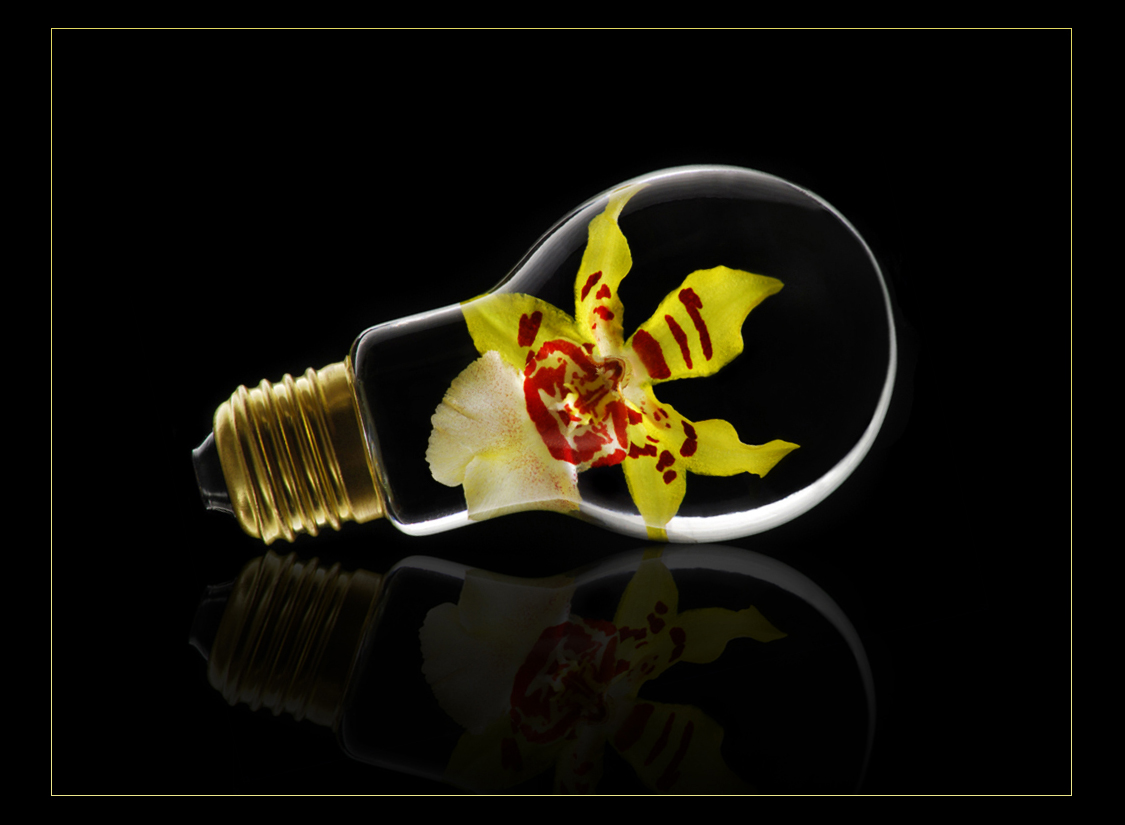 For a recap of topic of my presentation you can see a couple of my other articles about lighting glass on a dark background for photography. One of the techniques I shared was my photo “stage.” In this technique I light my glass subject using underlighting from below the tabletop surface which takes a little extra care to direct the light into the subject without it spilling onto the background and tabletop. We will also still define the edges of the glass with light. The times I have found this to be useful are when I am trying to light a fairly large or densely colored glass item. Another good reason to use this method is when there is a secondary subject (orchid) inside the glass subject (light bulb vase) that you will find out more about (including a diagram of the setup) in this article about how I created the image “Orchid Light v2” here.
There is also an article I wrote for Digital Photo Mentor (Darlene Hildebrandt) featuring glass lighting for photography techniques called “How to Photograph Glassware – DIY Studio Setup under $20” where you will see how to shoot glass on a dark field with a reflective tabletop surface including behind-the-scenes photos of the setup and several images created with that method including supplies and techniques. Read it here.
Many of the dark field glass images that I have created were part of a series for a photo essay. Each of the still images from that project are included in this short video from YouTube.
I am also working on screening useful, photography-related videos on YouTube and creating playlists. There is a lot of great (free) video tutorials out there, but it takes time to sort the truly useful from the rest. I have done some of the screening for you, so please visit and subscribe to my YouTube Channel to see the best of what I’ve found.
For further reading on the subject of lighting glass (or just about any subject) for photography, I highly recommend the book (find it on Amazon here) Light Science & Magic: An Introduction to Photographic Lighting written by Fil Hunter, Steven Biver and Paul Fuqua and published by Focal Press. Find more information about this book (and others) here.
Thank you!
While preparing for this presentation I discovered a few new pieces of gear to experiment with, thanks to Gary Farber with Hunt’s Photo and Video. I will be sharing more detailed information about the Rogue Flash modifiers and the Savage Macro Art Adjustable Dual Arm LED Light in an upcoming post too.
Presenting in the Macro (and Close up photography) track gave me the great fortune to meet Lisa and Tom Cuchara who are very enthusiastic, energetic and generous with their knowledge and teaching approach. They present photography programs to clubs, organizations and conferences and teach camera and post-processing techniques (find out more here) and own a Portrait Studio http://www.breaphotos.com/ in Hamden, CT
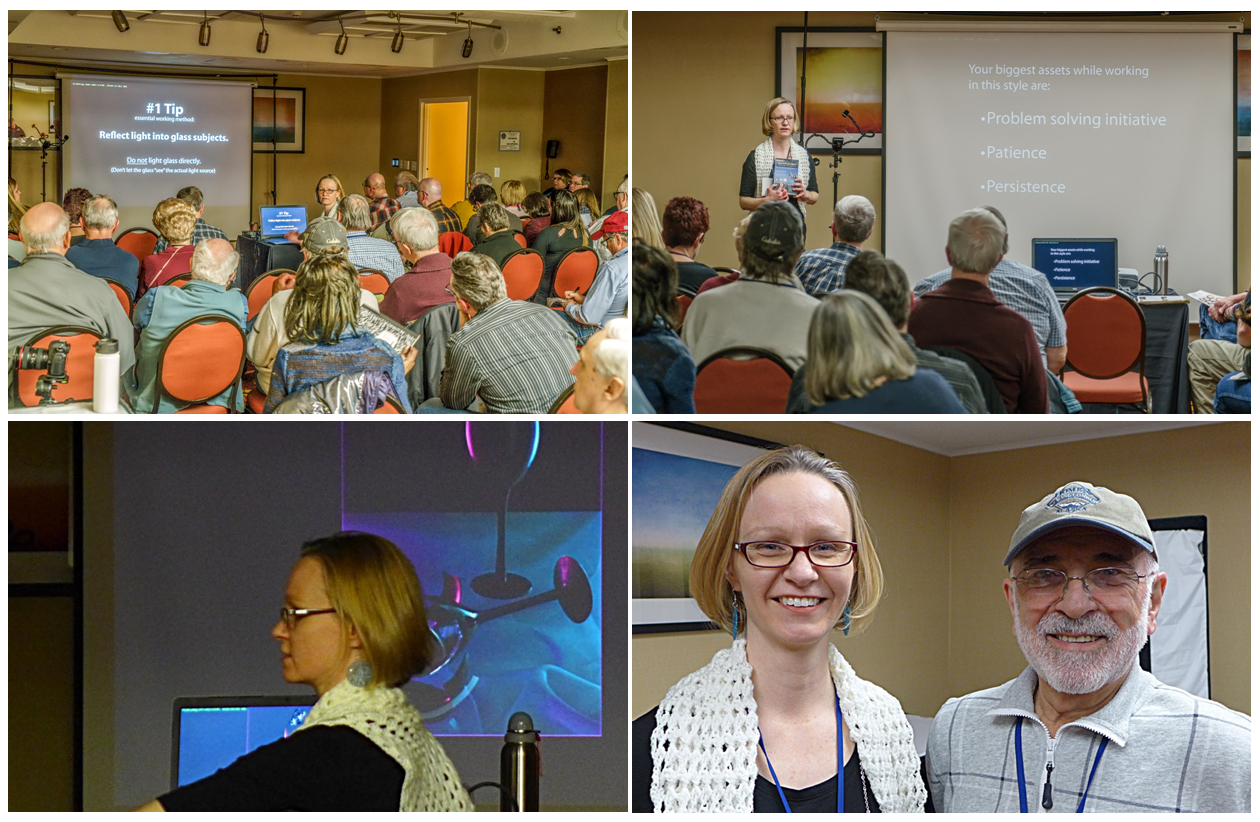 A special thank you to Mary Lou Frost who suggested my presentation be included in the 2016 CanAm Photo Expo and Doug Hansgate, the Convention Chairman who gave me the opportunity to be part of this awesome event. Thank you also to Robert Carey and Dave Valvo who kindly captured and shared photos for me during the presentation!
I will be presenting this program again at The Am-Center Camera Club and possibly a few more dates and places too. I will let you know when the details have been finalized. Please leave a comment below if you have any questions about the presentation or would like to schedule a presentation for your organization.
Thank you for stopping by! Sign up for my email list here: