Poppies for Memorial Day

Red poppies are worn on Memorial Day to honor people who have given their lives to protect the freedom of the citizens of the United States. Not only that, but the VFW sells the paper “Buddy Poppy” to help veterans and their widows, widowers and orphans. This tradition began with the inspiration from this poem written by Colonel John McCrae.

In Flanders Fields

In Flanders fields the poppies blow
Between the crosses, row on row,
That mark our place; and in the sky
The larks, still bravely singing, fly.
Scarce heard amid the guns below.

We are the dead. Short days ago
We lived, felt dawn, saw sunset glow,
Loved, and were loved, and now we lie
In Flanders fields.

Take up our quarrel with the foe:
To you from failing hands we throw
The torch; be yours to hold it high.
If ye break faith with us who die
We shall not sleep, though poppies grow
In Flanders fields.

For more details see this link to the US Department of Veterans Affairs.

This link to USMemorialDay.org credits Moina Michael as the first to wear and sell the poppy for remembrance. She also wrote a poem reply the above poem.

“We cherish too, the Poppy red
That grows on fields where valor led,
It seems to signal to the skies
That blood of heroes never dies.”

Today, on Memorial Day, take a break from the celebrations, cookouts and other festivities that we enjoy on this long weekend for the “National Moment of Remembrance.” At 3 PM, please observe this Moment of Remembrance and respect, by pausing from whatever you are doing for a moment of silence or listening to “Taps.”

Growing Poppies

To me poppies are very beautiful, delicate and intriguing flowers. Flowers are some of my favorite photography subjects too. My gardening skills aren’t great though. Luckily I know people who have an incredible green thumb and are gracious enough to let me wander aimlessly around their yard for a day trying to capture all the beauty that I see.

One of my neighbors enjoys gardening and camping, so she needs someone with special watering skills like me. HA! I can keep plants alive for 2-3 days – no problem.

Being Memorial Day weekend it is their first trip this year, so I got a special treat when I went into their back yard for the first time this season. My two small “hose assistants” wandered back there first and came back quickly to say “Mommy, it is BEAUTIFUL back there!” I was surprised by many more flowers than last year. Of course I wanted to just run back to my house and grab my camera, but I had a job to do first!

While I was watering I was thinking about how to capture all the different flowers and it seemed like I could have a pretty cool collection of images. Of course, I would also want to share those images with you here. Then my mind wandered to the other gardens I have been invited to photograph and it gave me a great idea to feature these gardens here. So look for those features coming up soon.

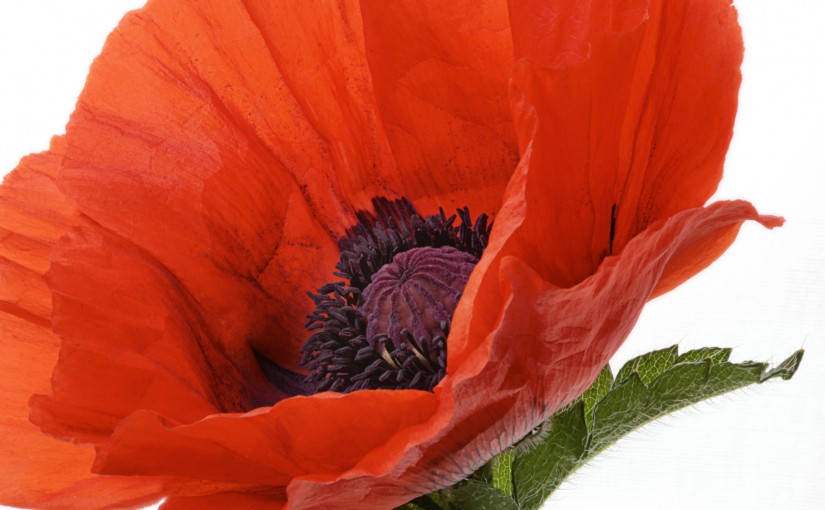
Back and forth I wandered with camera in-hand several times this weekend. For now, in honor of Memorial Day, I wanted to share one of her poppies. She has amazing poppies that grow in her front yard. I see the brilliant color from across the street. These things are the size of dinner plates! Really they are 7-8 INCHES across. I measured them. They always seem to bloom right around Memorial Day too. They are not red colored though, but I figured that was something I could
alter in Photoshop. Does it look convincing to you?

Poppies for Memorial Day 20160531
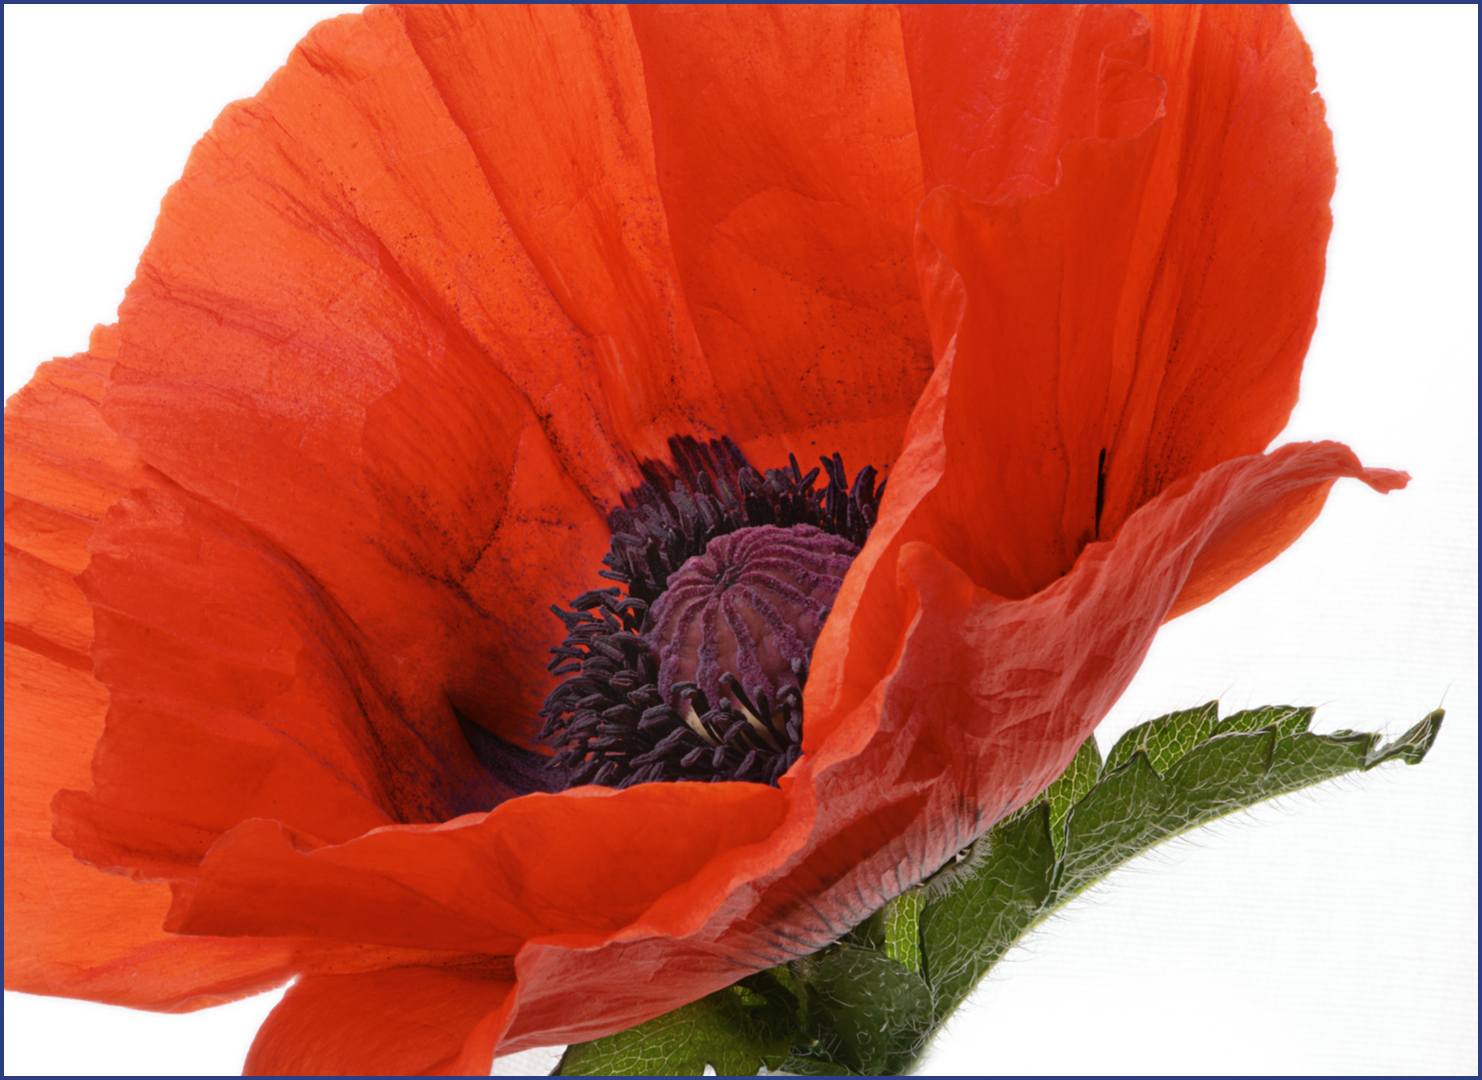
My watering stipend was permission to cut one of those babies. When I asked, she knew my plan. “You are going to take pictures, aren’t you?” I wanted to get that flower inside out of the breeze and with lighting I could completely control. These are the things that excite me. The best part is she is also going to give me a seed pod so next year I will have some of my own! In fact, many of the flowers and plants in my yard were given to me by her.

Thank you, Marley for the inspiration that blooms every year. Happy Memorial Day to you all!

Make Your Photos Look Great – ON PAPER!

It is the worst when you are excited about a photo, you pay to have it printed and it just doesn’t look right. When your photos just lose what you loved about them it is so disappointing…

Sometimes they look dull, dark or the colors are weird, they are over-sharpened or a variety of other issues.

When I started getting serious about photography, I started struggling with how and where to have my images printed. Not only did I see problems, but the problems were inconsistent. There didn’t seem to be any way to correct for the problems with processing my images because there was not any predictability in the outcome. It was frustrating.

It was even worse when my concerns were met with a shrug of the shoulder and maybe a free reprint, but what happens the next time I need to print the same file?

For anyone who has ever printed photos at drug stores, grocery stores, big box stores and many of the web only consumer websites this probably all sounds painfully familiar.

Thankfully I have a solution for you! This is professional quality photo printing and you can get $10 in prints for FREE to see the quality for yourself. You will be impressed with the printing, customer service, quick turn-around-time and even the packaging for shipment. (I also happen to think it is nice to support a family-owned business.) You have nothing to lose by checking them out. Go to iprintfromhome.com and create a new account. In the “Referred by” box enter Tweet-Cheryl Belczak and they will send you an email when your credit is ready.

So simple! And if you are ordering photos larger than a 4×6 their prices are actually LOWER than the drugstores!

There are even many different surfaces you can choose including a metallic finish. They also create Giclee Fine Art prints on Somerset Velvet Paper or Canvas. If you would like to see, feel and touch their printing, papers and print surfaces you can request a Paper Sample Kit. The kits feature the artwork of iprintfromhome.com customers.

This year I submitted a few of my images for consideration and the one at this one made it to the finalist pool with 32 others. It is now up to the popular vote on their Facebook page. I would appreciate your vote by adding your “Like” to this image before July 13, 2015 so I could be one of the 8 artists featured in the 2016 Calibration and Sample Kit. Thank you for your vote!

Please leave me a comment below to tell me about your experience with iprintfromhome.com.

Behind the Shot: The “Orchid Light” Image Evolution

A friend and I were wandering around Hobby Lobby one evening… We actually make “dates” to do this. Our husbands and kids stay home. Sometimes we have a list of things to collect for projects we are working on and we always browse for materials and inspiration. Usually I try to hold myself to only buying something only if I can dream up a specific purpose or a project for the item while I’m still in the store.

Orchid light_evolutionWhen I discovered this little flat bottomed light bulb vase I made an exception. I knew I wanted to stick something inside it and take a photo. Usually that isn’t enough. I could make a case for almost anything if I just told myself I wanted to take a photo of it, but it seemed unique and it was $1.99.

After it came home with me it just collected dust for months. My “lightbulb moment” (sorry for the bad pun) came when I had the incredible opportunity to attend a Mike Moats Macro Boot Camp. One of the participants brought an orchid to share and get some guidance about shooting them. I was one of the last few people to leave and saw a single flower that had been pinched from the plant. Again I brought it home with nothing more than the intention to photograph it. Then it hit me! And I devised a plan to shoot these two items together.

Thankfully I was able to come up with an effective shooting methodology pretty quickly because I had devised a method for lighting the inside of a vase before. Strange – I know, but true.

diagram_vase lit belowMy plan put the orchid and water inside the lightbulb vase. On my tabletop, I placed a cardboard box that held my accessory flash lying on its back connected to a sync cord so the light would be directed into the bottom of the vase to light the flower. (If I tried to light the flower from any other angle you would see small white – specular – highlights reflecting the light source in the glass).

Next I placed a piece of black posterboard with a hole slightly smaller than the bottom of the vase cut into it and a piece of glass from a picture frame on top of that. That is the stage (or floor) set up for the original shot. The vase was placed over the hole (to let the light from the flash through) and the flash. There was a piece of black foam core propped up behind the stage acting as the background. I used two pieces of white foam core board (one on each side) to reflect and indirectly bring the light from the primary light source around to light the glass and metal.

Both the glass and metal are highly reflective materials that produce a bright white hotspot (specular highlight) on the surface if there is a light source hitting them directly at an angle the camera can see. For this reason I work in a dark room and my primary light source (a utility clamp lamp with an incandescent light bulb) is placed behind the black foam core background. The two white pieces of foam core act as reflectors and become larger sources of indirect light. They are responsible for the bright rim light around the edge of the glass. The rim light allows the form of the vase to be seen within the dark field or black background.

The exposure time needs to be fairly long to record the rim light, so a tripod is also necessary. The tripod is also helpful for holding the exact camera position too if you need to tweak the lighting and reshoot.

Orchid Light: Version 1 was created by rotating the original photo 180 degrees then building the top of the lightbulb in Photoshop (copying, pasting and cloning). I also cloned out many tiny bubbles that resulted from the water in the vase… Maybe I should have tried this without the water first! A valuable tip if you want to try something similar.

Although I was mostly happy with Version 1, something still didn’t seem right. Maybe it was the fact that the lightbulb was just floating in air? Probably. Anyway I belong to a camera club and participate in monthly competitions. After a busy month I found myself at the deadline without a submission plan, so Version 1 made the cut. The feedback I received in competition was that the subject did not seem to be perfectly vertical. That was quite noticeable when it was projected at a few feet wide. Although I was disappointed that the score didn’t reflect my effort that went into this image (all those BUBBLES!), showing the image to others and getting another perspective gave me an idea to rework the image.

This time I placed a horizontal guide line in the Photoshop file as a reference to create at virtual table top. I rotated the image until the light bulb lined up as though it was sitting on the guide. Then I copied the lightbulb, flipped it horizontally, lowered the opacity, added a gradient mask to fade the copy at the bottom of the image and skewed it slightly to make the copy look like a reflection on a shiny surface. This made Orchid Light: v.2.Orchid Light v.2

Maybe at some point there will be v.3 if the mood or idea strikes. If you have any questions about this project please leave a comment below.