A friend and I were wandering around Hobby Lobby one evening… We actually make “dates” to do this. Our husbands and kids stay home. Sometimes we have a list of things to collect for projects we are working on and we always browse for materials and inspiration. Usually I try to hold myself to only buying something only if I can dream up a specific purpose or a project for the item while I’m still in the store.
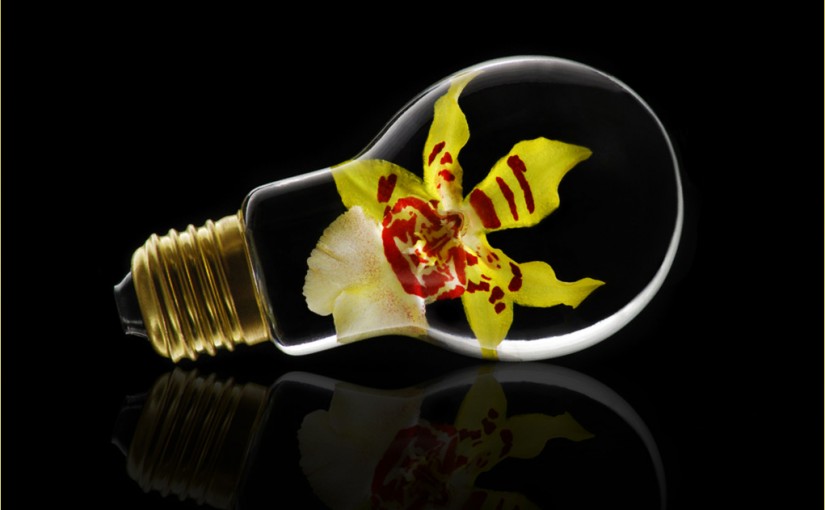
 When I discovered this little flat bottomed light bulb vase I made an exception. I knew I wanted to stick something inside it and take a photo. Usually that isn’t enough. I could make a case for almost anything if I just told myself I wanted to take a photo of it, but it seemed unique and it was $1.99.
After it came home with me it just collected dust for months. My “lightbulb moment” (sorry for the bad pun) came when I had the incredible opportunity to attend a Mike Moats Macro Boot Camp. One of the participants brought an orchid to share and get some guidance about shooting them. I was one of the last few people to leave and saw a single flower that had been pinched from the plant. Again I brought it home with nothing more than the intention to photograph it. Then it hit me! And I devised a plan to shoot these two items together.
Thankfully I was able to come up with an effective shooting methodology pretty quickly because I had devised a method for lighting the inside of a vase before. Strange – I know, but true.
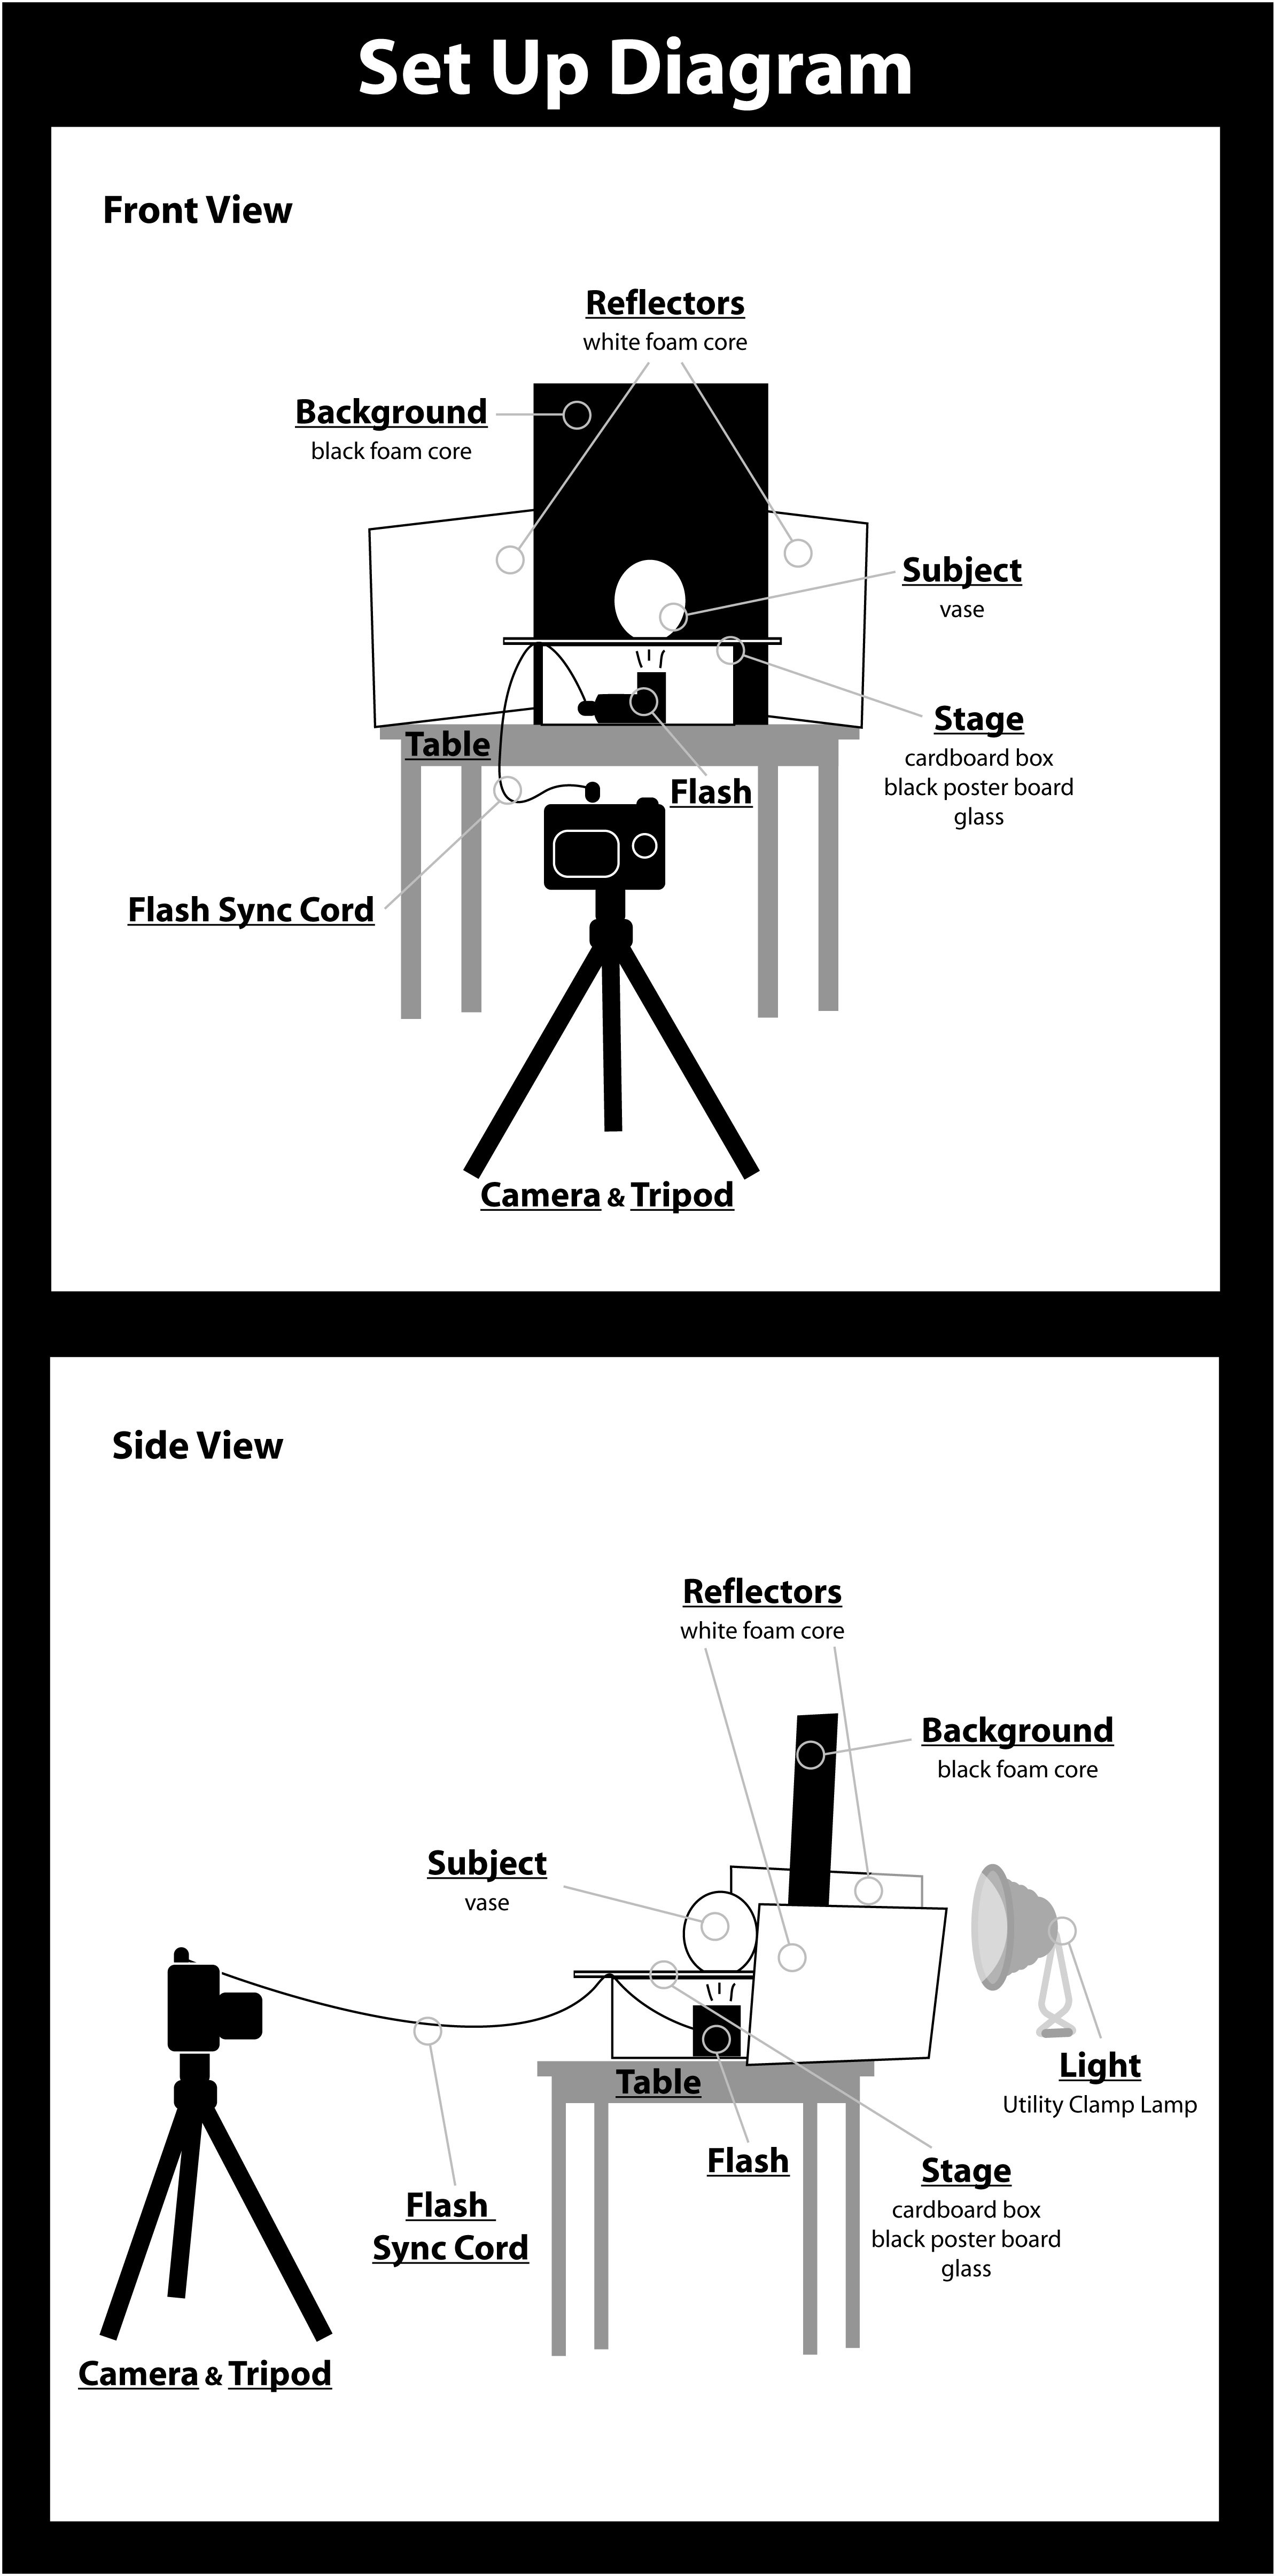 My plan put the orchid and water inside the lightbulb vase. On my tabletop, I placed a cardboard box that held my accessory flash lying on its back connected to a sync cord so the light would be directed into the bottom of the vase to light the flower. (If I tried to light the flower from any other angle you would see small white – specular – highlights reflecting the light source in the glass).
Next I placed a piece of black posterboard with a hole slightly smaller than the bottom of the vase cut into it and a piece of glass from a picture frame on top of that. That is the stage (or floor) set up for the original shot. The vase was placed over the hole (to let the light from the flash through) and the flash. There was a piece of black foam core propped up behind the stage acting as the background. I used two pieces of white foam core board (one on each side) to reflect and indirectly bring the light from the primary light source around to light the glass and metal.
Both the glass and metal are highly reflective materials that produce a bright white hotspot (specular highlight) on the surface if there is a light source hitting them directly at an angle the camera can see. For this reason I work in a dark room and my primary light source (a utility clamp lamp with an incandescent light bulb) is placed behind the black foam core background. The two white pieces of foam core act as reflectors and become larger sources of indirect light. They are responsible for the bright rim light around the edge of the glass. The rim light allows the form of the vase to be seen within the dark field or black background.
The exposure time needs to be fairly long to record the rim light, so a tripod is also necessary. The tripod is also helpful for holding the exact camera position too if you need to tweak the lighting and reshoot.
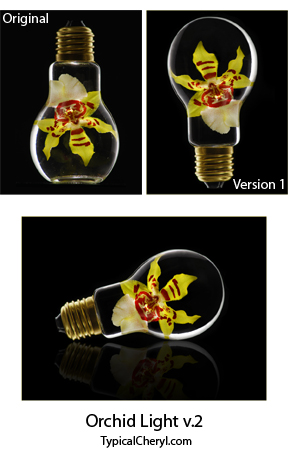
Orchid Light: Version 1 was created by rotating the original photo 180 degrees then building the top of the lightbulb in Photoshop (copying, pasting and cloning). I also cloned out many tiny bubbles that resulted from the water in the vase… Maybe I should have tried this without the water first! A valuable tip if you want to try something similar.
Although I was mostly happy with Version 1, something still didn’t seem right. Maybe it was the fact that the lightbulb was just floating in air? Probably. Anyway I belong to a camera club and participate in monthly competitions. After a busy month I found myself at the deadline without a submission plan, so Version 1 made the cut. The feedback I received in competition was that the subject did not seem to be perfectly vertical. That was quite noticeable when it was projected at a few feet wide. Although I was disappointed that the score didn’t reflect my effort that went into this image (all those BUBBLES!), showing the image to others and getting another perspective gave me an idea to rework the image.
This time I placed a horizontal guide line in the Photoshop file as a reference to create at virtual table top. I rotated the image until the light bulb lined up as though it was sitting on the guide. Then I copied the lightbulb, flipped it horizontally, lowered the opacity, added a gradient mask to fade the copy at the bottom of the image and skewed it slightly to make the copy look like a reflection on a shiny surface. This made Orchid Light: v.2.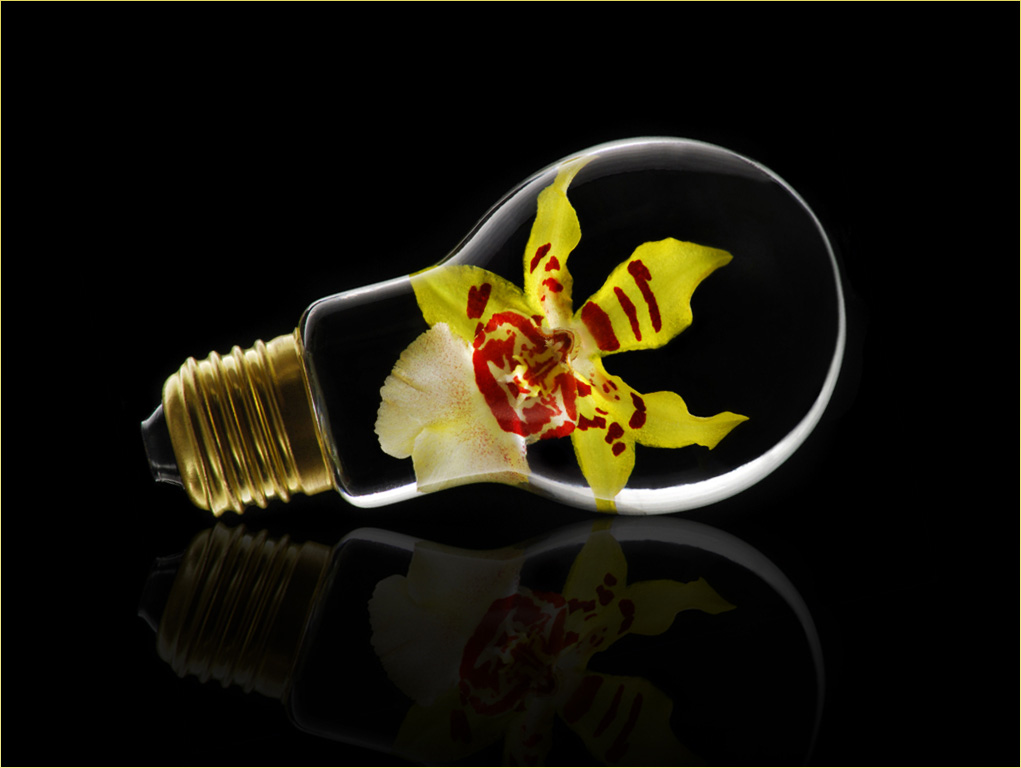
Maybe at some point there will be v.3 if the mood or idea strikes. If you have any questions about this project please leave a comment below.