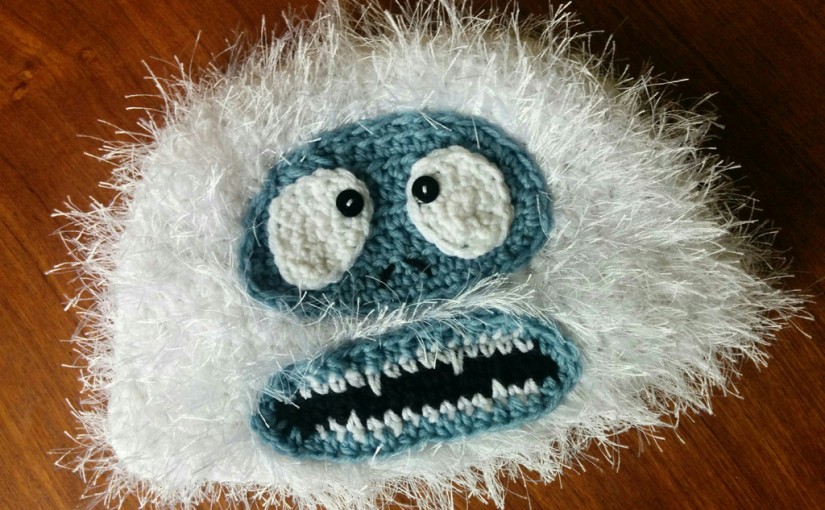
Make the lovable, fuzzy nemesis-turned-friend from Rudolf the Red Nose Reindeer come alive with a handmade crochet hat!
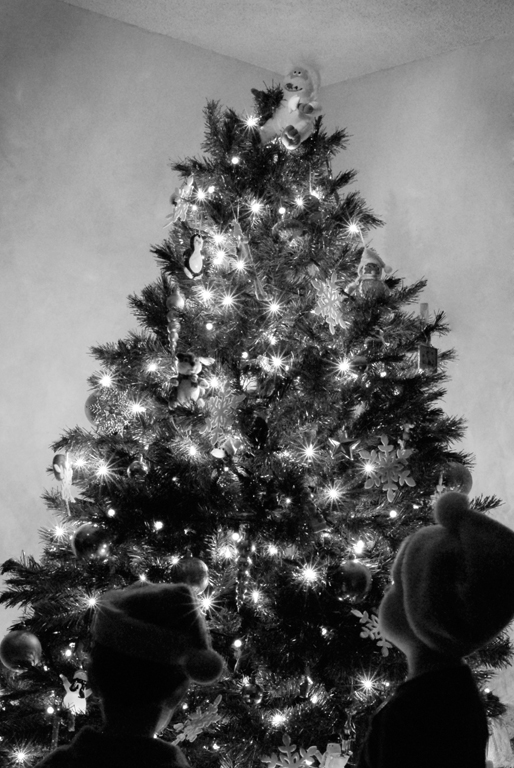
The abominable snowman is a favorite in our house. In fact, he adorns the top of our Christmas tree! I have been searching for a more “appropriate” star or angel for years, but I haven’t found something I really like yet… Now my boys and husband are so accustomed to having the abominable snow monster at the top I will have a hard time changing the tradition when I do find a more conventional tree topper.
When I found this pattern, my husband fell in love. We had found his funny, quirky hat for snow blowing! There hasn’t been any snow yet here this year, but I’m guessing our kids and all the kids in the neighborhood will get a laugh while he is out working!
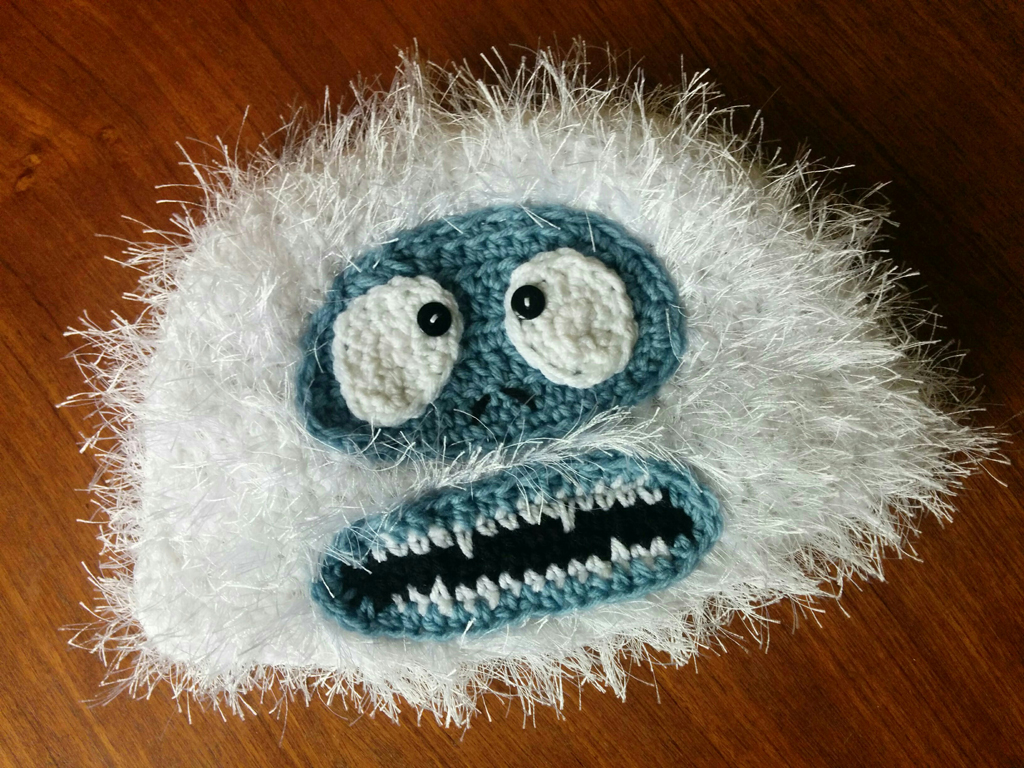
This is a free crochet pattern available by PDF download on Ravelry. It was created and shared by Rachel Solberg Designs. (Thank you, Rachel!) Sizes included are 6 months to adult. The photo looks different, but the pattern gives details about using fun fur yarn held together with worsted weight yarn to give it the wild, fuzzy look you see here.
The yarn used in this project is white Red Heart Super Saver yarn held together with eyelash style Lion Brand Fun Fur yarn to make this warm, furry and fuzzy looking hat. I found my Fun Fur at JoAnn’s and I needed more than one 64 yard skein for this adult size hat. I think one skein would be enough for child-sized hats. It seemed that the Fun Fur yarn would be difficult to work with, but it wasn’t! It was surprisingly easy. The fun fur yarn isn’t thick enough to use by itself so that is why I held it together with worsted weight white acrylic yarn. I tried to lighten up my tension a bit to not get the hook tangled up too much. It is challenging to pull out if you need to rework anything, but not impossible. Light tugging worked to pull out stitches without damaging the yarn… No need to ask how I know! Sewing the pieces on got a little hairy (ha!). It was easy to fix though by pulling the white fur back out of the blue areas. The blue was from a scrap ball of acrylic yarn that I inherited, so I don’t have any information to share about that. The color looks like faded or de-saturated light blue. I keep thinking of it as a “country blue.”
Check back, I plan to add a photo with the hat “in action” when we have enough snow to haul out the snow blower, but I am not in any hurry for that to happen!
Please share your photos or questions in the comments if you make these hats too. These would make great gifts and I have heard they also sell well at craft fairs. Thank you for visiting and sharing this post!
To receive email updates with tips, tutorials and musings, please sign up here:
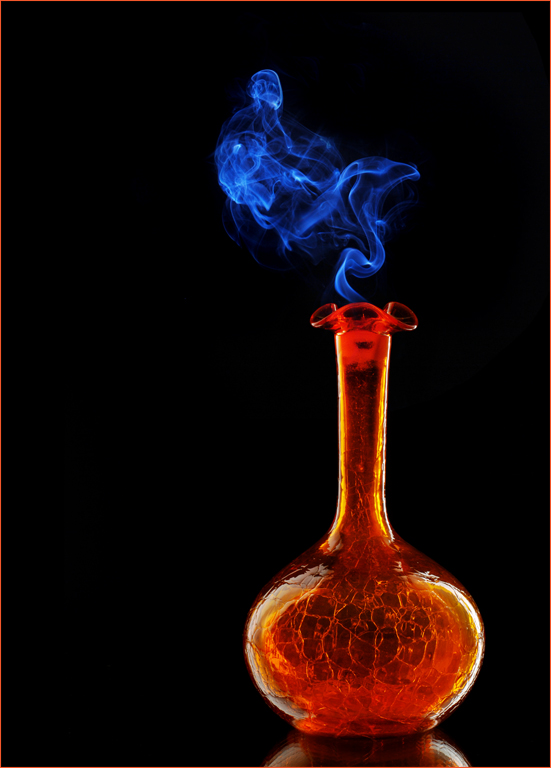
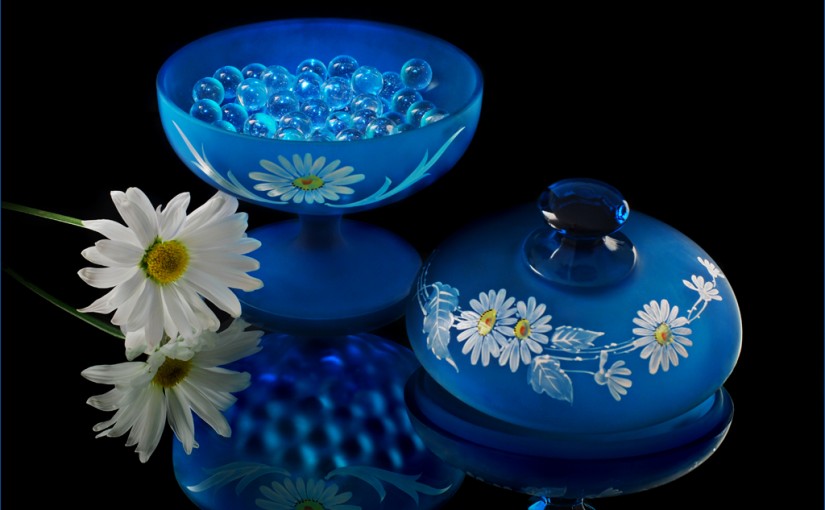
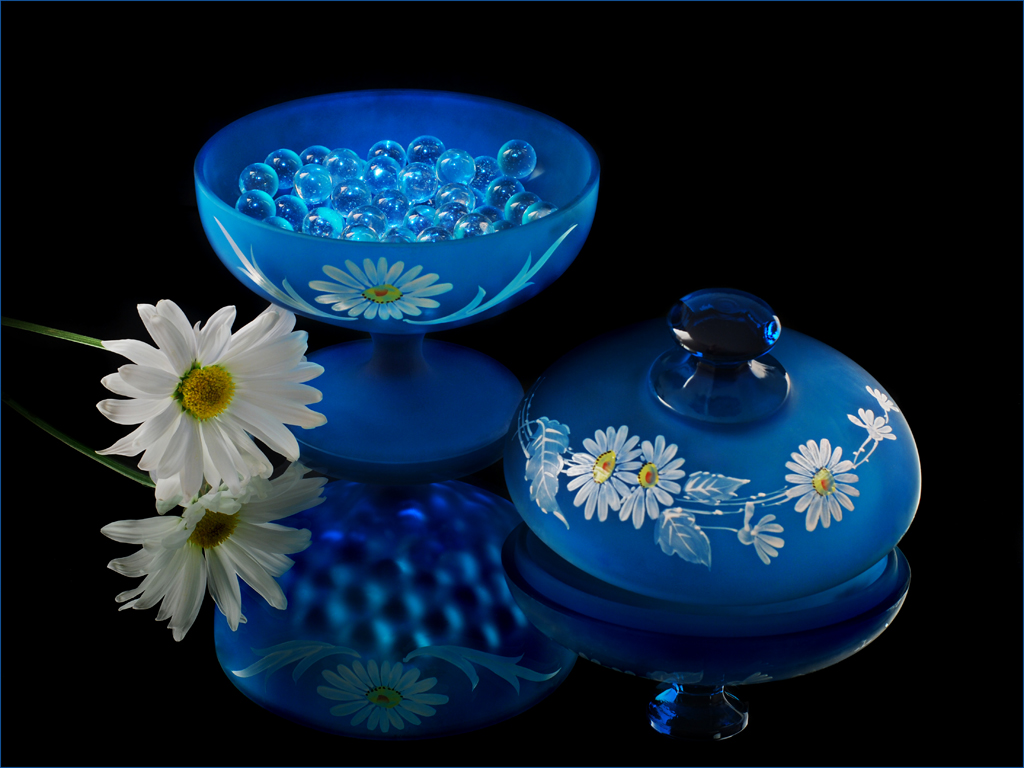
This photo “Genie Bottle” was shot using the glassware photography methods and DIY studio set up detailed in this article. Composite created with incense smoke photo shot separately.
Your questions and thoughts are welcomed! Please leave a comment below. To receive email updates with tips and tutorials, please sign up here:
Yeah, I did it. I sent homemade cupcakes to school. ON THE FIRST DAY!
I know. I can almost hear the gasps.
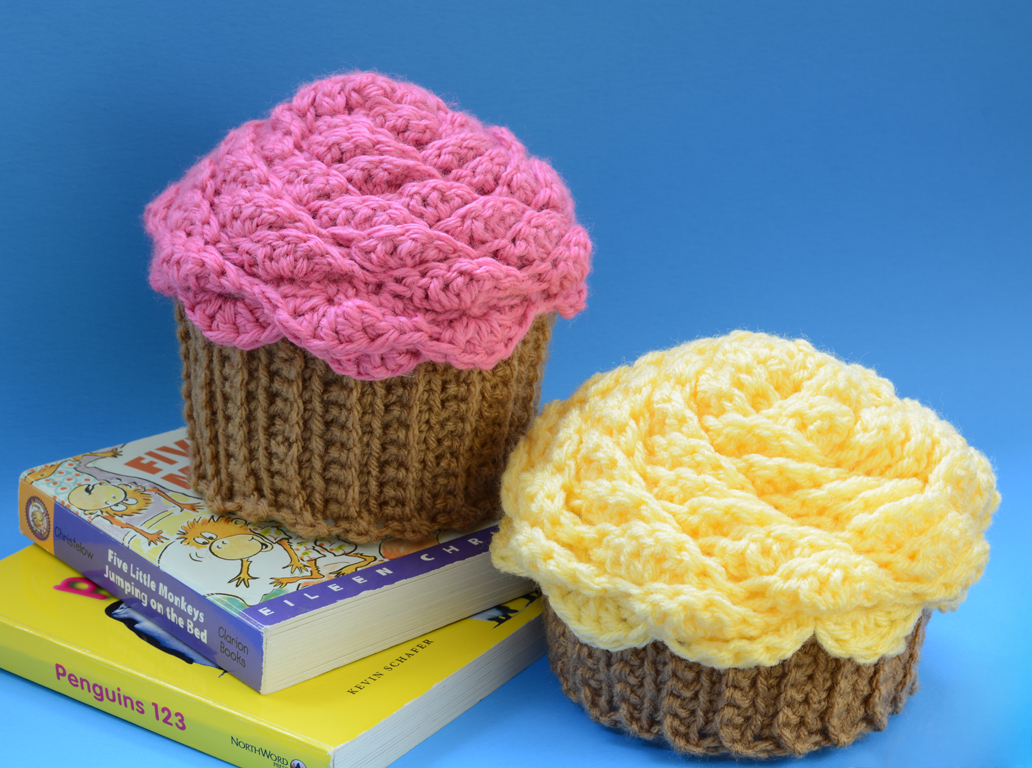
Now slowly lower your hand as I tell you I wasn’t trying to pump my little Pre-K sweet pea and his classmates full of sugar to make them emotional time bombs at pick-up time. Actually these homemade cupcakes are made out of crochet!
You can find the adorable free, easy-to-follow pattern and tutorial to customize the crochet to fit the size of your container from GoodKnits here. There are even variations, but I like how the “frosting” really seems to swirl and pile up here. The crocheted pieces are hot glued to a recyclable food container, so you can even use it as a gift box or trinket box. I used pure acetone to remove the screen printed labels because it bothered me that you could see the writing from the inside of the cupcake. After I had them completed, I realized Chinese food soup containers would have been a perfect size and would have saved me a step. Sometimes the timing of my ideas could use some refining! At least it makes for a good tip for you.
These were made as a gift for a teacher who loves to bake with a cupcake specialty. It would also be a fun little birthday gift box. Happy crocheting.
Your questions and thoughts are welcomed! Please leave a comment below. To receive email updates with tips and tutorials, please sign up here:
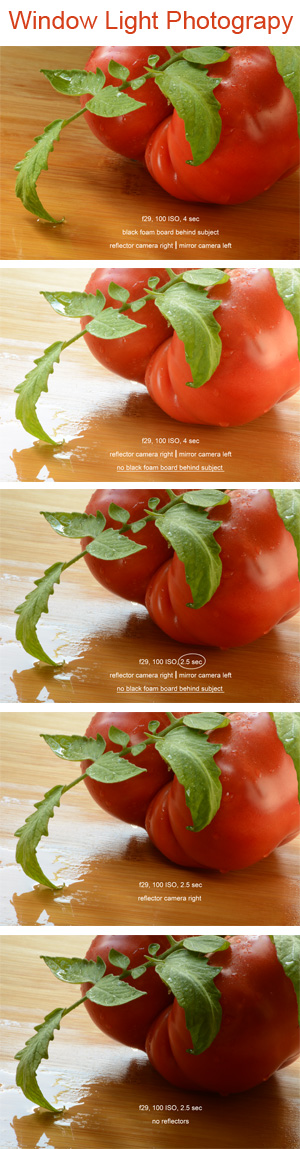
Using window light and some low cost light modifiers is an easy way for you to explore and craft lighting for a table top still life set up. If you don’t have lighting equipment you can do this! Experiment and you will be able to dramatically change the look of your photos. This exercise is great for anyone who wants to refine their lighting skills. It gives you ideas, confidence and experience to work anywhere. Let’s look at some easy and surprisingly dramatic differences made by modifying light with simple changes.
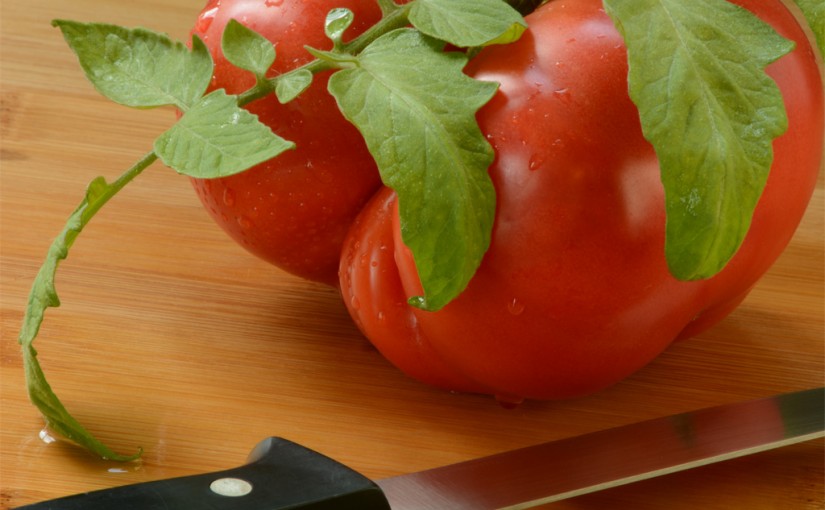
For my example this tomato caught my eye weeks ago. Today I discovered it was the first to ripen in my garden! The shape of it was interesting to me and I felt that showing just part of it emphasized what I found to be unique about it. I also wanted to evoke the thoughts, feelings and maybe flavors of tomatoes fresh from the garden. It seemed that placing a freshly washed tomato on a cutting board with knife would encourage the viewer think about cutting and tasting it. The green leaves added a complementary color to scene (green and red) while reinforcing the “fresh from the garden” idea.
The behind the scenes photo shows you how to set up the shot. Note the camera is on a tripod to make composing precise and it gives you the ability to take the same photo with slight adjustments to see the difference. Also the scene may seem bright to your eyes, but to a camera using a small aperture/ high f number (for maintaining focus throughout the scene) it will need a shutter speed longer than can be hand held. If you also use a remote trigger or your camera’s self timer it will free your hands to hold a light reflector. For any photo labeled “mirror camera left,” I stood next to my scene to the right of the camera and used a small mirror to reflect light onto the tomato then pressed my remote to take the photo.
The black foam board behind the subject helps you control how or where the light enters the scene. It allows the light to wrap around the subject with side and backlighting. For comparison you can see how the light affects the scene without it. Also as you can see without reflecting light back into the front of the scene the subject becomes dark.
Take some time to look at the differences in these photos, but more importantly do this yourself! You will learn the most that way. Find a window with bright light that doesn’t directly shine through the window. Choose a subject and start experimenting and learning. I’d love it if you tell me what you notice from your experiences in the comments below.
To receive email updates with tips and tutorials, please sign up here:
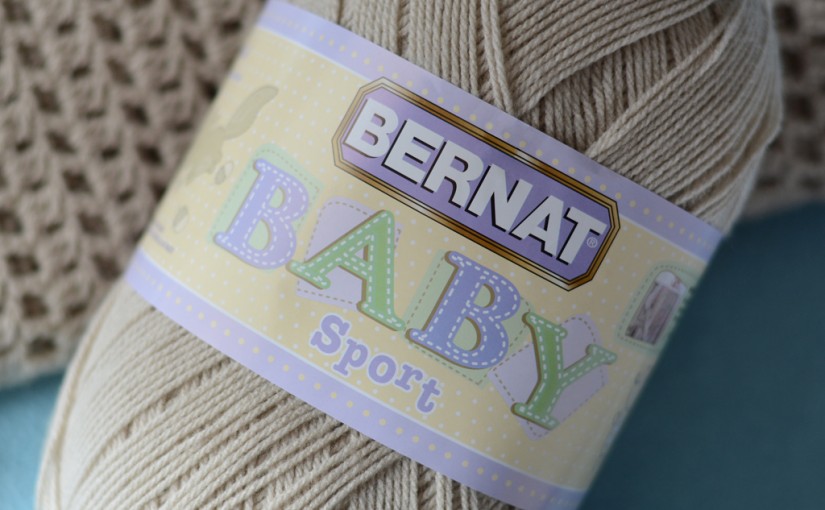
Let me start by saying I bought this yarn myself (actually this is the third super-huge skein) and I am not being compensated in any way to write this.
I just use this yarn ALL THE TIME and wanted to share this awesome find with you! I found it in the baby yarn section, so if you aren’t specifically working on a baby project – you may not discover it. Now let me share why you should look for it.
The Bernat Baby Sport yarn is soft, lightweight and this “Baby Taupe” color is a very versatile neutral for babies and adults. It is great to make baby accessories and is valuable to have on hand for a variety of projects when inspiration strikes!
It is sold in an “economical big ball” size weighing in at 350g / 12.3 oz, 1148 meters / 1256 yards. That amount of yarn will make many small projects (hats, booties, baby toys, gift card holders, infinity scarves, mittens, fingerless mitts) or even an entire larger project. For example, I completed a baby blanket with one skein… That is how I found – and fell in love with – this yarn.
It is also easy to care for because it is machine wash and dryable, 100% acrylic. It works very well to make baby accessories for expecting moms, especially when the gender will be a surprise. It is a light-colored neutral color that won’t stain as easily as white or cream colors and it will still coordinate with most nursery color schemes. It’s also a nice for something a little different from the more common syrupy-sweet pastels. It still looks great with more traditional baby pink, blue and yellow too.
As a sport weight (3 gauge) the strand is thinner than more common worsted weight (4). The weight of this yarn is very similar to Caron Simply Soft yarns, but it does not have the shiny sheen. If you want to work a pattern intended for that yarn with more of a matte-looking yarn – this is it. However if you are working with a pattern that calls for worsted weight yarn, it will turn out smaller with this yarn. You could use that to your advantage if (for example) you want to make a hat smaller than the pattern. Just use this yarn and a smaller hook. It will probably take some experimenting to get the sizing exactly as you want too.
Another advantage is that with fabrics made with this yarn will be lighter and will have more motion, flow or a softer drape compared with worsted weight. This is great for lacey patterns or wraps and light scarves yet the material and color give it a casual touch.
The fabric you see in the background is a preview of a lightweight wrap for a woman that can be worn three ways. Also since this color is so versatile it can easily be worn in the spring, on cool summer nights or even in the fall… And yes, it can be made with one skein! I will be sharing a free, easy crochet pattern for it soon. While you wait, go out and get yourself some of this yarn. The suggested retail price is $9.99, so with one of those 40% off coupons. How can you go wrong? Update: The wrap pattern is now available here.
Leave a comment below to show and tell what you are making with this yarn. To receive email updates with tips, tutorials and other freebies as they are released, please sign up here!
It is the worst when you are excited about a photo, you pay to have it printed and it just doesn’t look right. When your photos just lose what you loved about them it is so disappointing…
Sometimes they look dull, dark or the colors are weird, they are over-sharpened or a variety of other issues.
When I started getting serious about photography, I started struggling with how and where to have my images printed. Not only did I see problems, but the problems were inconsistent. There didn’t seem to be any way to correct for the problems with processing my images because there was not any predictability in the outcome. It was frustrating.
It was even worse when my concerns were met with a shrug of the shoulder and maybe a free reprint, but what happens the next time I need to print the same file?
For anyone who has ever printed photos at drug stores, grocery stores, big box stores and many of the web only consumer websites this probably all sounds painfully familiar.
Thankfully I have a solution for you! This is professional quality photo printing and you can get $10 in prints for FREE to see the quality for yourself. You will be impressed with the printing, customer service, quick turn-around-time and even the packaging for shipment. (I also happen to think it is nice to support a family-owned business.) You have nothing to lose by checking them out. Go to iprintfromhome.com and create a new account. In the “Referred by” box enter Tweet-Cheryl Belczak and they will send you an email when your credit is ready.
So simple! And if you are ordering photos larger than a 4×6 their prices are actually LOWER than the drugstores!
There are even many different surfaces you can choose including a metallic finish. They also create Giclee Fine Art prints on Somerset Velvet Paper or Canvas. If you would like to see, feel and touch their printing, papers and print surfaces you can request a Paper Sample Kit. The kits feature the artwork of iprintfromhome.com customers.
This year I submitted a few of my images for consideration and the one at this one made it to the finalist pool with 32 others. It is now up to the popular vote on their Facebook page. I would appreciate your vote by adding your “Like” to this image before July 13, 2015 so I could be one of the 8 artists featured in the 2016 Calibration and Sample Kit. Thank you for your vote!
Please leave me a comment below to tell me about your experience with iprintfromhome.com.
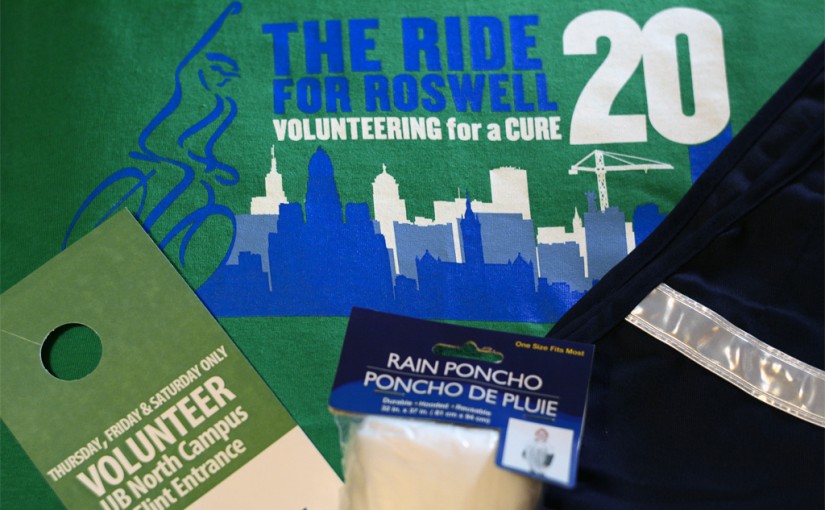
Batteries charged, lenses clean, media cards empty and I have a parking permit with my official “Photographer” vest. I even picked up a poncho because we are expecting A LOT of rain.
My gear is ready. Am I?
The Ride for Roswell is a bicycling event fundraiser to benefit the Roswell Park Cancer Institute. Around Buffalo, NY we are quite familiar with this institution. If you aren’t familiar, it was “Founded in 1898 as the nation’s first cancer center, Roswell Park set the standard for today’s multidisciplinary approach to the highest quality cancer care.” It is the 20th annual Ride for Roswell benefit this year. It is also the first time I will participate beyond pledging to Riders. I will be a volunteer photographer.
After participating and volunteering in other cause-related fundraising events, I know they are emotionally charged. Some people are celebrating triumphs, others are working through struggles and some are remembering and honoring their losses. Many stories and tears are shared. As a sensitive person who has lost an incredible person in my life to cancer, I’m not sure I will have the strength to handle the emotional roller coaster throughout the day. I also imagine the intensity will be super-charged because it is a milestone anniversary year for the Ride for Roswell.
As I write this, the memories of pain, courage, strength, battle and defeat in the face of cancer are overwhelming me emotionally…
It seems I’ll need to pack some tissues in my camera bag too. I am determined to get out there to do my small part to support others with the hope that the story of their battle ends with triumph!
We all have those days or weeks (maybe – months?) when we don’t know what, how or why to create.
Maybe we try and get frustrated or just don’t feel motivated to try at all. I’ve been there and I know many creative people who experience the same thing. So if you’re wondering why this happens to you… I hope it helps you to know that you are not alone with this. It was comforting to me when I realized it, so I hope to share that with you. I’ve even read the theory that being creative is a cycle and a period of creative drought is part of the process.
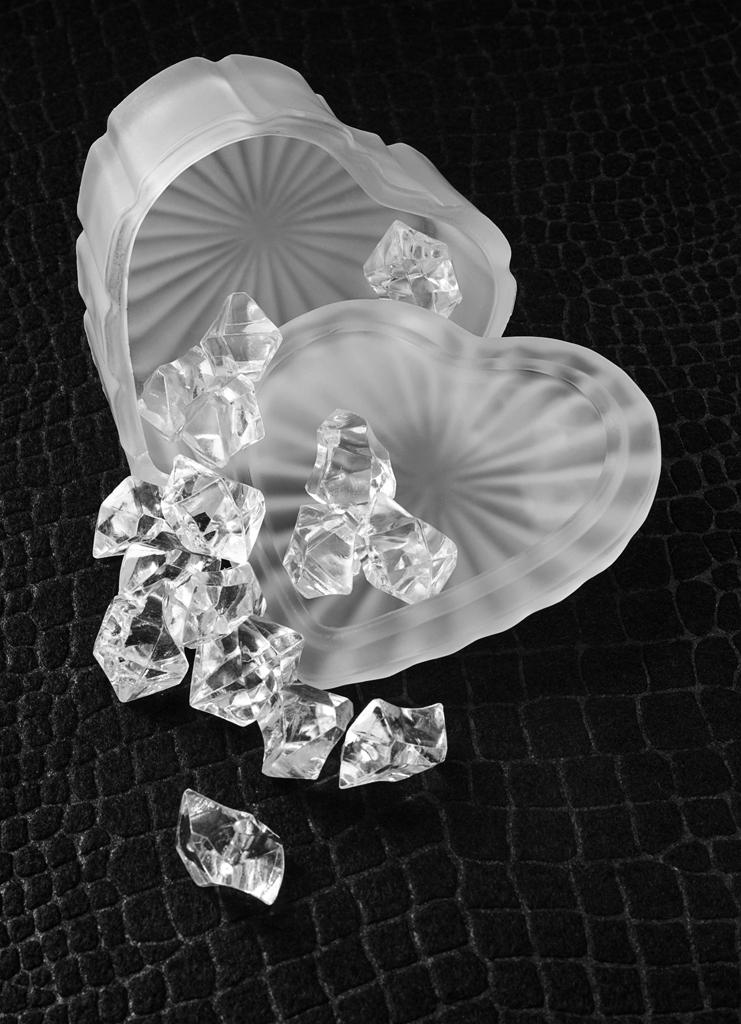
Open your heart of glass and ice spills out: the world of the broken-hearted. Black and white still life image created by Cheryl Belczak with a window light challenge.
Part of the process or not, it brings me peace to notice, understand and choose my own ways of coping with it. I try to find things to occupy my time and thoughts in an effort to work toward busting through the grip of unseen creative barriers.
Sometimes it is not glamorous. A massive cleaning/organizing/decluttering initiative puts my hands to work, making progress I can be proud of, while leaving my mind free to wander, imagine and scheme. Never underestimate the power of a freshly organized desk to put your mind in the right creative mindset! Yes, some may call this procrastinating…
Flower Dream. Photo by Cheryl Belczak taken while “ON ASSIGNMENT” with an in-camera double exposure challenge.
Other times I turn to alternative projects. I read an article titled “What to Do if You Can’t Find Your Passion” by best-selling author Elizabeth Gilbert, where she shared “I temporarily ease off the pressure by exploring something new, some completely unrelated creative endeavor—something that I could find interesting, but with much lower emotional stakes.” She speaks of passions and curiosities. This was familiar to me because I had been doing this. Yet I was doing it without the realization and intuition that this is helpful and perhaps part of the process. For me my passion is photography. Aside from that I explore other things that somehow benefit my photography. Activities like reading, gardening, writing, crocheting and other things. [Check here for more information about a quick, inspiring and motivating book that will get back to your work.] I usually try to incorporate some level of creativity into everything I do. Even getting dressed!
Another method that seems to be more proactive, related and relevant is to go “ON ASSIGNMENT.” For me, it helps to limit my technique or subject in photography in order to explore one concept more completely. It also motivates me to *just shoot* without so much pressure.
Usually the images I am most proud of are the ones that I carefully set up, compose and light. This leads me to resist using my camera if I don’t have the time, energy or patience to be that involved and engaged. These are the times when an assignment or challenge gives me the freedom to not be so serious and just shoot to see what happens.
I participated in an online monochrome challenge with the Digital Photo Mentor, Darlene Hildebrandt where she suggested setting the camera to record in monochrome. I did not like that idea for many reasons, but I took the leap anyway and learned a lot. I learned enough to fill another post and to recognize all my “reasons” as excuses. Check back for the link to my thoughts about it.
Currently I’m involved in a “Black and White Working Group” where we meet once a month for four months to explore the concept of black and white photography including what makes a compelling black and white image and how to create one ourselves by making and talking about our own images. At each session we are also challenged with a subject and/or technique. My current assignment is to use window light only. Often I shoot at night with artificial light at night. This challenge forced me to find time during the day to work and it seemed like it would be less complicated to set it up, but the ultimate benefit is that this assignment pushed me to experiment, take photos and learn from the experience.
Now I know that the next time I’m feeling unmotivated or intimidated by using my camera. I will look for an assignment. If you would like to try the same thing you can find ideas or challenges online. I find it’s best to find a buddy or community AND a due date to make it happen. Many people find daily projects (the 30 day or 365 day shoot-every-day type) to be a great learning experience. I’ve tried a few times and haven’t been successful yet. I’ll try again, but I feel that if you choose a large project like that it could be awesome… And it could completely backfire! I felt lousy that I couldn’t keep up. Also if you are trying to ride out a productivity slump, this may not be the best time to dive into that kind of project. You know yourself best if you can handle it, but I would suggest something a little different. Try just limiting one aspect of your photography. Some ideas include:
Shoot Double Exposures in-camera
Commit to a tripod
Set your camera to record in monochrome
Take photos inside using only window light (modify however you like by diffusing or reflecting it – just don’t use any additional light sources)
Use only one lens
A prime (fixed focal length, non-zoom) lens makes it most challenging by forcing you to “zoom” by moving your feet
Try a specialty lens for an artistic look. You could choose
Lensbaby lenses to create selective focus images
Fisheye lenses with unique distortions
Holga lenses offer a low fidelity, imperfect look of a plastic lens with softness, edge vignette and even some light leaks for a vintage-style look
These are just a few of many possible ideas. What other “ON ASSIGNMENT” ideas would you like to try? What other resources and communities inspire and motivate you? We’d love for you to share in the comments below. Thank you for reading and your feedback! Wishing you much creativity and motivation!
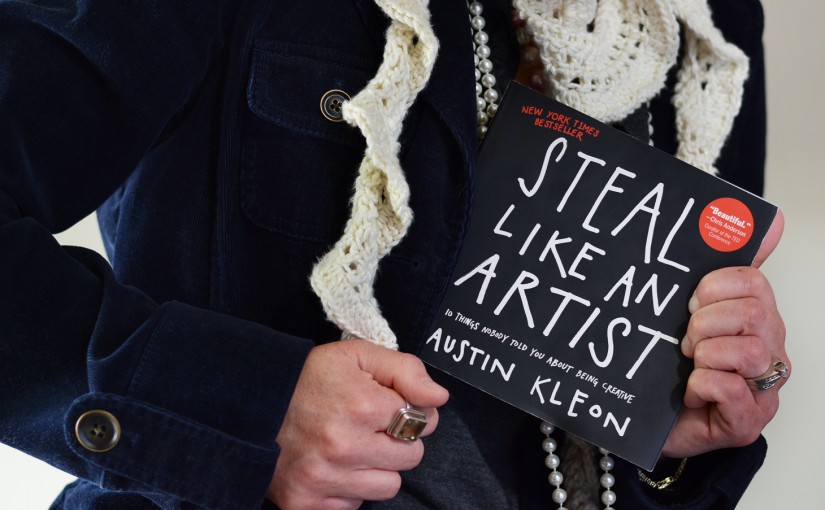
When I heard about this book I wanted to dismiss it. After all, I’m trying to be creative. Why do I want to steal?
However, it is a New York Times Bestseller and it was recommended by an incredibly talented, creative photographer who I admire, Deb Sandidge. So I decided to crack the book with a reluctantly open-ish mind. It seemed like the responsible thing to do. You know – to find out what this guy was saying, so I could create my informed reasons to disagree…
Should you steal?
To my surprise, I truly enjoyed reading this book. It has changed my perspective and gave me more freedom to enjoy, study and be inspired by the work of other artists, writers, photographers and people doing many kinds of work. It has shown me how I can soak up their work, digest it and let it flow back out of my mind and hands in altered way that makes it mine.
This is a book is a great addition to your personal library. Read and re-read it. “Steal Like an Artist” is a quick-read that will inspire and motivate you. It picks you up, dusts you off and gives you direction to go off and running with renewed energy and interest in creating great work… No matter what your work of choice. Get a copy of this book. Just don’t steal mine!
If you would like to see if any of my stuff is “worth stealing” please connect with me and subscribe here.
A friend and I were wandering around Hobby Lobby one evening… We actually make “dates” to do this. Our husbands and kids stay home. Sometimes we have a list of things to collect for projects we are working on and we always browse for materials and inspiration. Usually I try to hold myself to only buying something only if I can dream up a specific purpose or a project for the item while I’m still in the store.
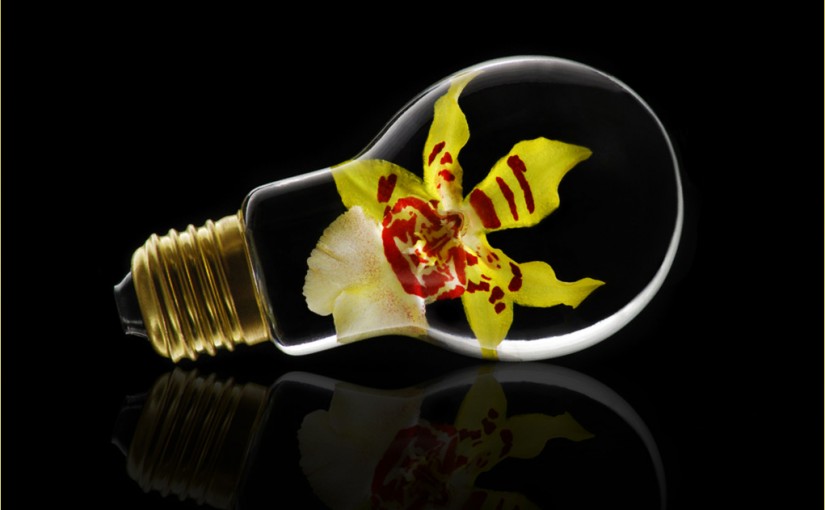
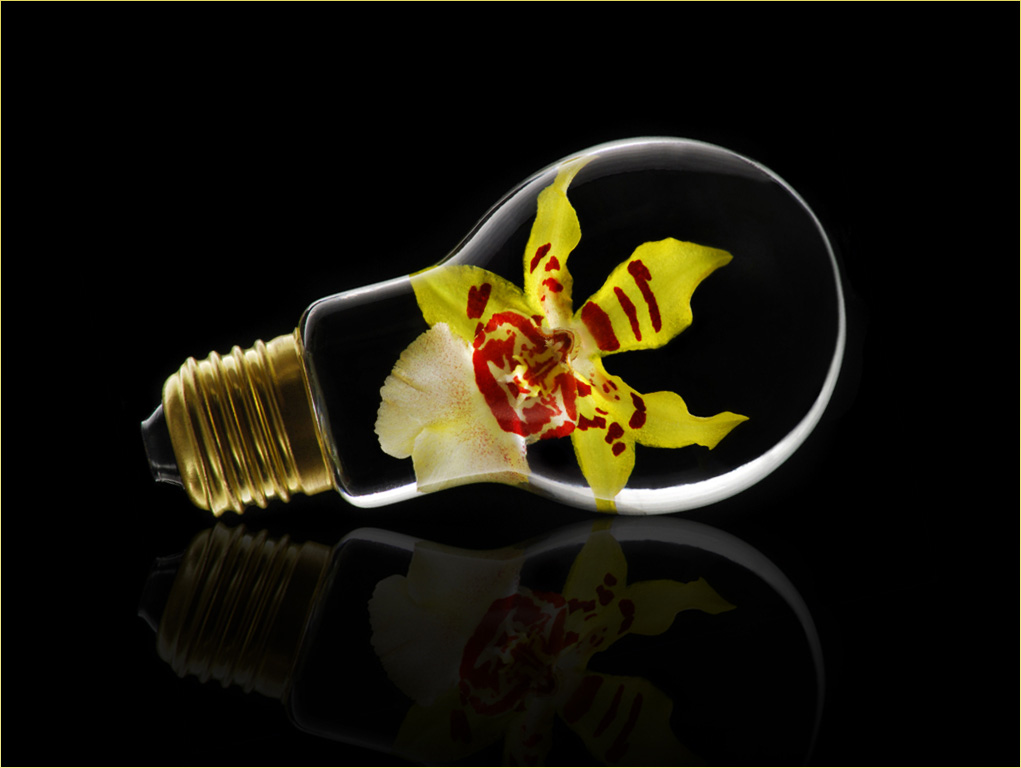
When I discovered this little flat bottomed light bulb vase I made an exception. I knew I wanted to stick something inside it and take a photo. Usually that isn’t enough. I could make a case for almost anything if I just told myself I wanted to take a photo of it, but it seemed unique and it was $1.99.
After it came home with me it just collected dust for months. My “lightbulb moment” (sorry for the bad pun) came when I had the incredible opportunity to attend a Mike Moats Macro Boot Camp. One of the participants brought an orchid to share and get some guidance about shooting them. I was one of the last few people to leave and saw a single flower that had been pinched from the plant. Again I brought it home with nothing more than the intention to photograph it. Then it hit me! And I devised a plan to shoot these two items together.
Thankfully I was able to come up with an effective shooting methodology pretty quickly because I had devised a method for lighting the inside of a vase before. Strange – I know, but true.
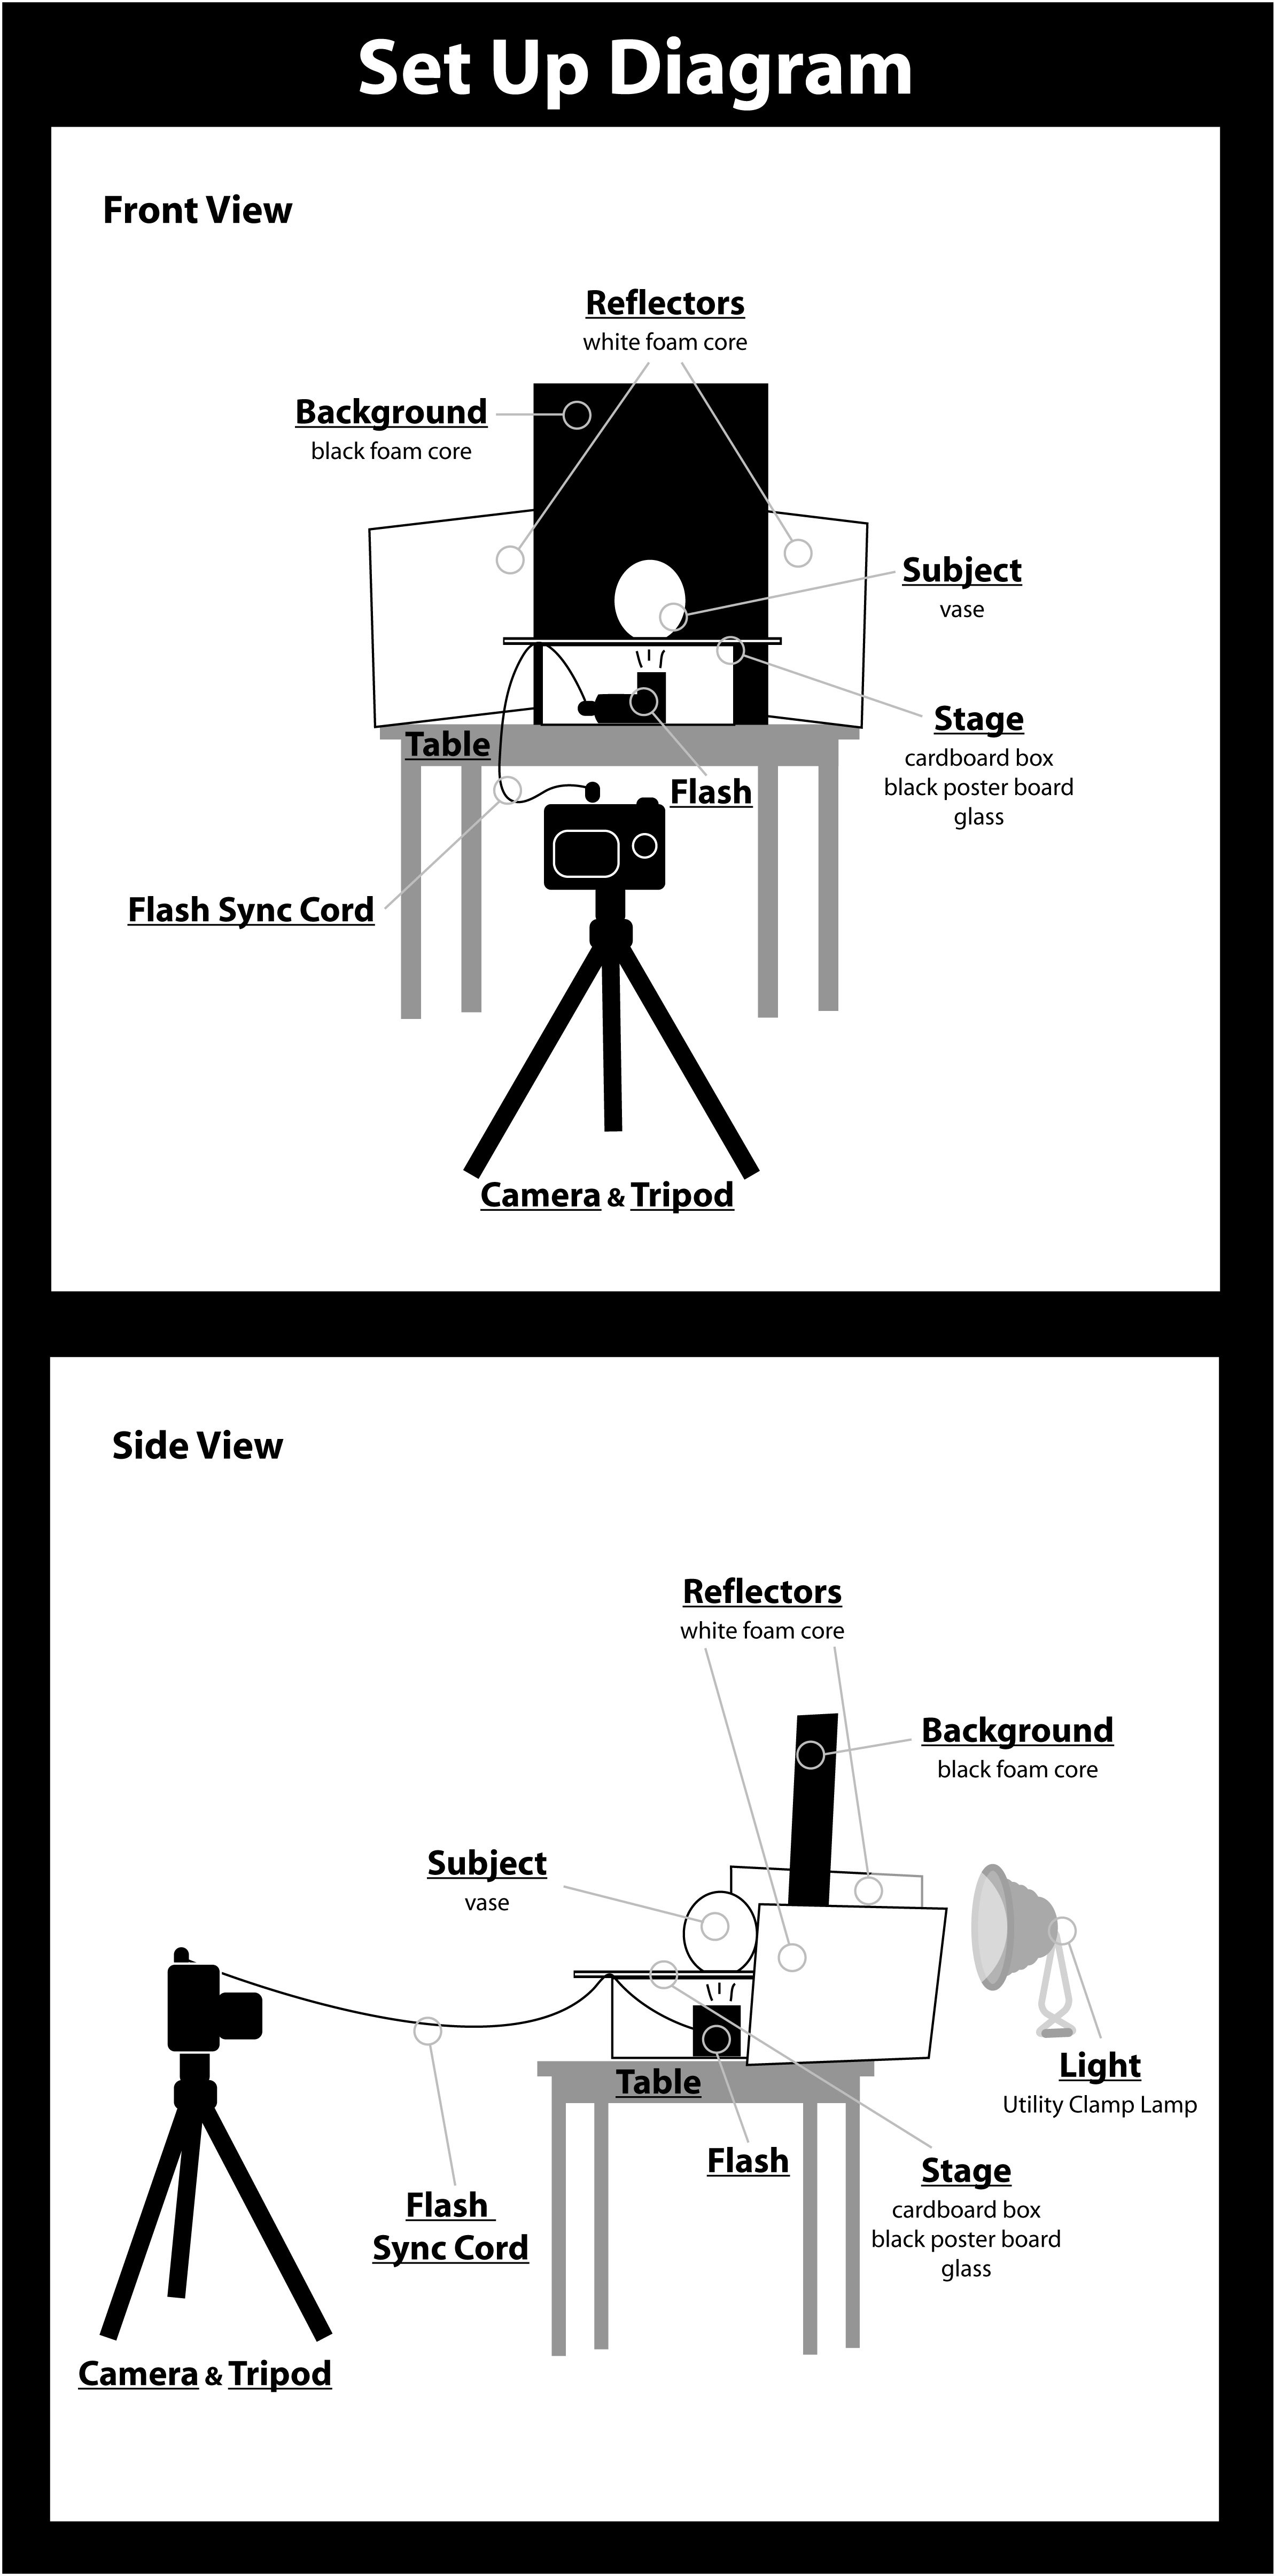
My plan put the orchid and water inside the lightbulb vase. On my tabletop, I placed a cardboard box that held my accessory flash lying on its back connected to a sync cord so the light would be directed into the bottom of the vase to light the flower. (If I tried to light the flower from any other angle you would see small white – specular – highlights reflecting the light source in the glass).
Next I placed a piece of black posterboard with a hole slightly smaller than the bottom of the vase cut into it and a piece of glass from a picture frame on top of that. That is the stage (or floor) set up for the original shot. The vase was placed over the hole (to let the light from the flash through) and the flash. There was a piece of black foam core propped up behind the stage acting as the background. I used two pieces of white foam core board (one on each side) to reflect and indirectly bring the light from the primary light source around to light the glass and metal.
Both the glass and metal are highly reflective materials that produce a bright white hotspot (specular highlight) on the surface if there is a light source hitting them directly at an angle the camera can see. For this reason I work in a dark room and my primary light source (a utility clamp lamp with an incandescent light bulb) is placed behind the black foam core background. The two white pieces of foam core act as reflectors and become larger sources of indirect light. They are responsible for the bright rim light around the edge of the glass. The rim light allows the form of the vase to be seen within the dark field or black background.
The exposure time needs to be fairly long to record the rim light, so a tripod is also necessary. The tripod is also helpful for holding the exact camera position too if you need to tweak the lighting and reshoot.
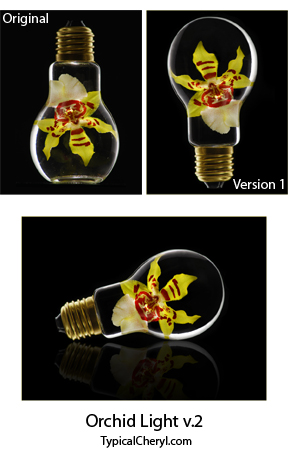
Orchid Light: Version 1 was created by rotating the original photo 180 degrees then building the top of the lightbulb in Photoshop (copying, pasting and cloning). I also cloned out many tiny bubbles that resulted from the water in the vase… Maybe I should have tried this without the water first! A valuable tip if you want to try something similar.
Although I was mostly happy with Version 1, something still didn’t seem right. Maybe it was the fact that the lightbulb was just floating in air? Probably. Anyway I belong to a camera club and participate in monthly competitions. After a busy month I found myself at the deadline without a submission plan, so Version 1 made the cut. The feedback I received in competition was that the subject did not seem to be perfectly vertical. That was quite noticeable when it was projected at a few feet wide. Although I was disappointed that the score didn’t reflect my effort that went into this image (all those BUBBLES!), showing the image to others and getting another perspective gave me an idea to rework the image.
This time I placed a horizontal guide line in the Photoshop file as a reference to create at virtual table top. I rotated the image until the light bulb lined up as though it was sitting on the guide. Then I copied the lightbulb, flipped it horizontally, lowered the opacity, added a gradient mask to fade the copy at the bottom of the image and skewed it slightly to make the copy look like a reflection on a shiny surface. This made Orchid Light: v.2.
Maybe at some point there will be v.3 if the mood or idea strikes. If you have any questions about this project please leave a comment below.
 This is a free crochet pattern available by PDF download on Ravelry. It was created and shared by Rachel Solberg Designs. (Thank you, Rachel!) Sizes included are 6 months to adult. The photo looks different, but the pattern gives details about using fun fur yarn held together with worsted weight yarn to give it the wild, fuzzy look you see here.