Painted Dahlia – Before and After Photo Editing

Let’s get this out of the way… I believe in getting photos “right in-camera” as much as possible. However, you and I know perfect conditions don’t always coordinate with our schedules. So when I saw the flower in the “before” photo my choices were:

  1. Leave the camera in the bag, or
  2. Take the darn photo and see what I could do in Photoshop

There is no harm in trying. Right?
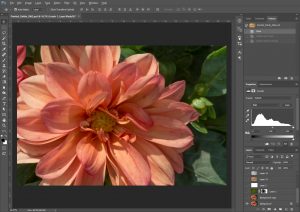
Painted Dahlia Before Editing
Notice the levels histogram. There is detail in all of the highlights because the histogram does not touch the right where highlights are shown.

Instead of getting upset with myself for forgetting my diffuser or pleading with the clouds to return, I decided that at worst this would be a learning opportunity. Of course, if this experiment had failed it would just be between my computer and me anyway… Good thing it can’t talk!


Photo Editing Painted Dahlia Before and AfterThis is going to be the first in a series of “Before” and “After” editing guides. Hopefully you will get ideas by seeing my process. You certainly don’t need to follow what I’ve done exactly. In fact, what works for one image will sometimes look terrible on another. The plan is to share some methods and reasoning to give you ideas of tricks and methods to try in your own editing. This concept has been rolling around in my head for a while. Today I got a push to make it happen thanks to questions from the wonderfully supportive Artistic Floral Photography group on Facebook called Pholorography and lead by the talented and encouraging teacher and photographer, Jackie Kramer.

Make Lemonade Out of Lemons

So you can thank Jackie’s most recent group theme “Make Lemonade Out of Lemons” where we were all sharing our photo editing transformations and all the wonderful people who wanted to know more. You gave me the kick in the pants I needed to get this going.

Make It Better In Camera

Let’s talk about the issues with the original photo and better options. The light on this flower is from harsh, overhead, mid-day sun. This makes for strong contrast and sharp distracting shadows on the flower. It would have been a more appealing photo out-of-the-camera if I had taken it:

  1. When there was soft, overcast light from cloud cover
  2. If it were in the shade (sometimes I use my own body to create the shade for a small subject)
  3. If I made the light softer by using a diffuser (and possibly also a reflector too)

The background elements are also distracting because they are relatively sharp with uneven light. Using the techniques above would have also helped make the background less distracting too.

We Can’t Go Back In Time

So let’s try something. Actually, before I took this photo I knew I was going to try to use the Mixer Brush in Photoshop to even out the hard shadow edges and take advantage of the wide range of color tones from the high contrast light. I took care to make sure the parts of the flower with the brightest light on it was not over-exposed (or blown out) because I didn’t want to lose any detail in the highlights.

My camera settings were 1/200 sec, f/14, ISO 100

Once I brought this into Photoshop for editing I knew I wanted to:

  1. Add painterly brush strokes to the petals
  2. Create a softer, more pastel overall color palette
  3. Make the background more subtle and painterly
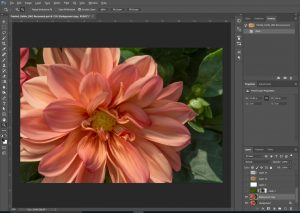
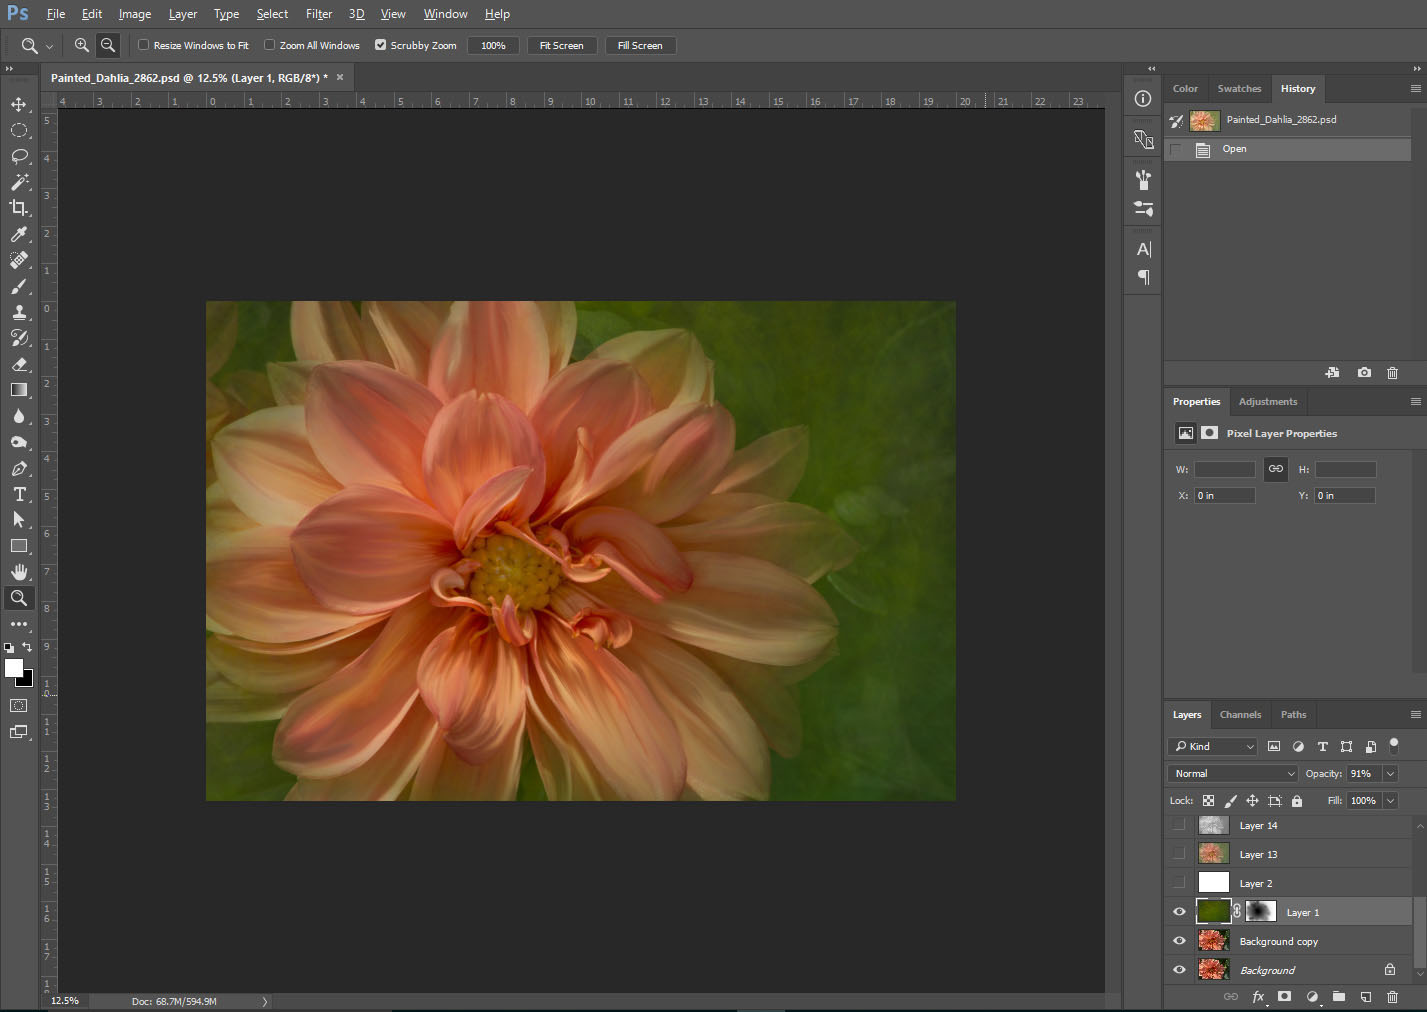
To start I like to duplicate my background layer so I can turn off the layers above to evaluate the editing progress. On the duplicate layer I cloned out any blemishes then set to work adding brush strokes to the petals using the Mixer Brush (introduced in PS CS5) with the Spatter 24 Pixel brush tip from the default brush palette and a Clean, Wet brush settings. I took care not to brush on the edges of the petals so the edge lines would remain realistic and varying size and whether I was brushing from light to dark or dark to light.
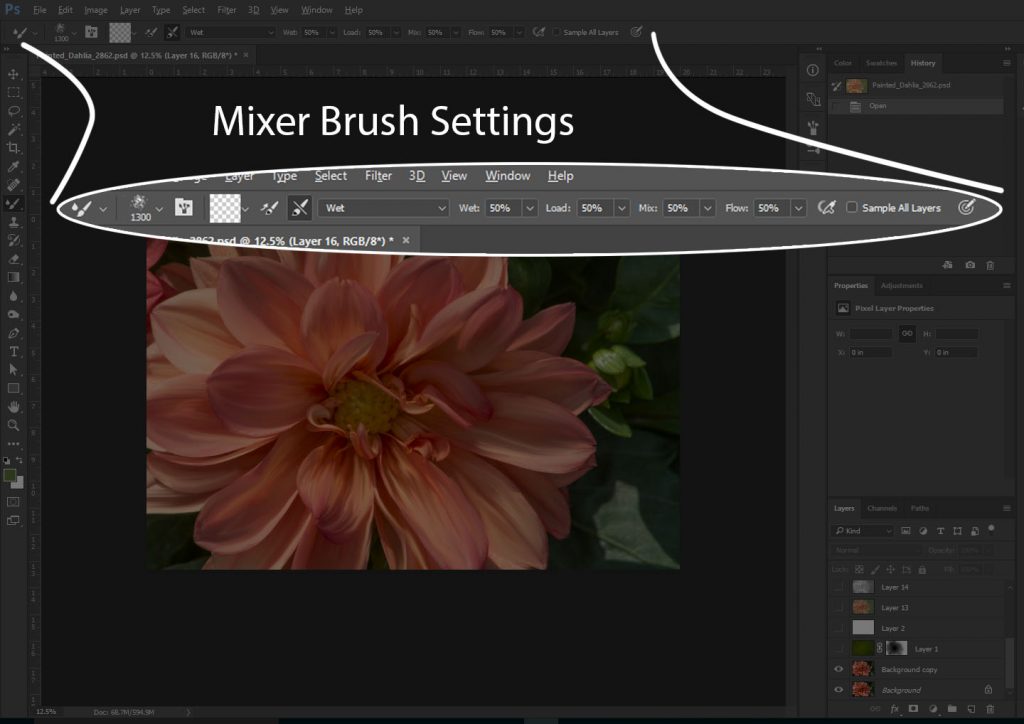
 

Scott Deardorff Mixer Brush Controls Video

Here is an easy-to-understand, detailed 10 minute video that will help you understand all the settings and functionality of the Mixer Brush tool by Scott Deardorff on YouTube. 
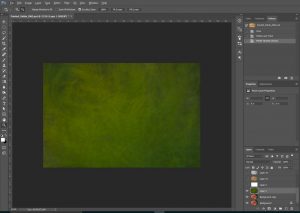
 

Then I added a layer with a texture I created from a multiple exposure photo of goldenrod flowers. I lowered the opacity of the texture layer to 91% with a normal blend mode and I masked it mostly off the flower with a soft brush.

Next I added a blank layer, filled it with white and lowered to the opacity to 22% with a Normal blend mode. This made the colors more pastel and lowered the overall contrast, but it looked a little flat to me. I played with different ideas including converting it to black and white.
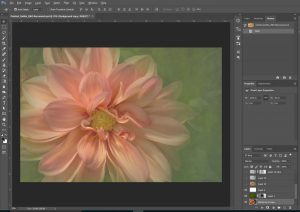
 

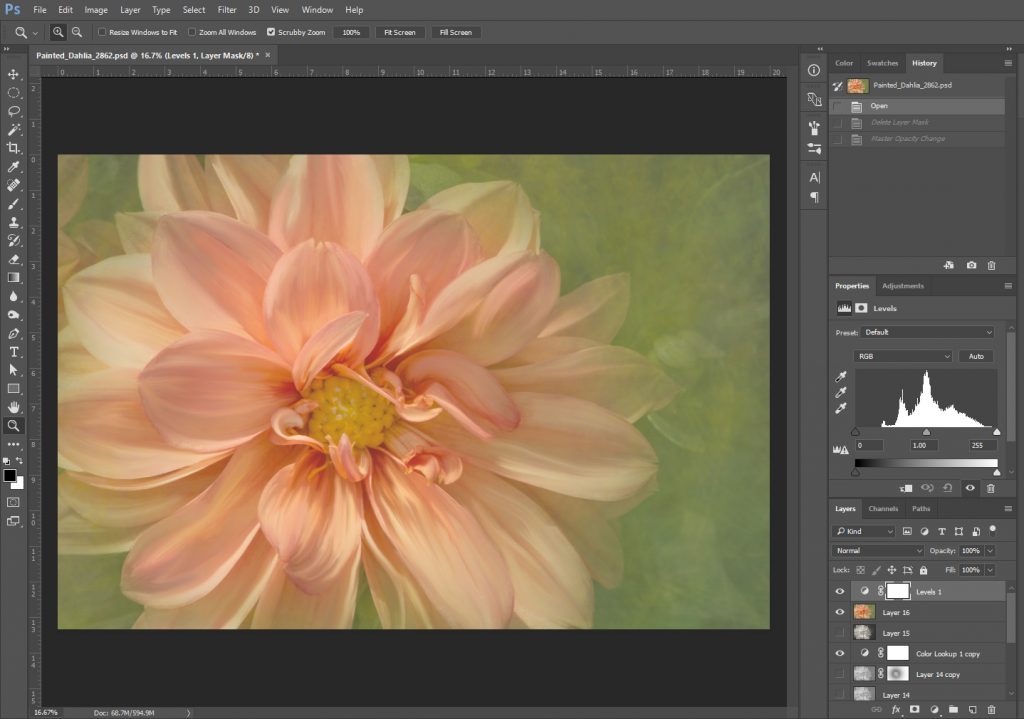
Finally I experimented with Color Lookup Table Adjustment Layers and found that using the “filmstock50.3dl” setting with the Normal Layer Blend Mode set to 46% gave my finished image the color, brightness, contrast and luminosity I liked.

Are We There Yet?

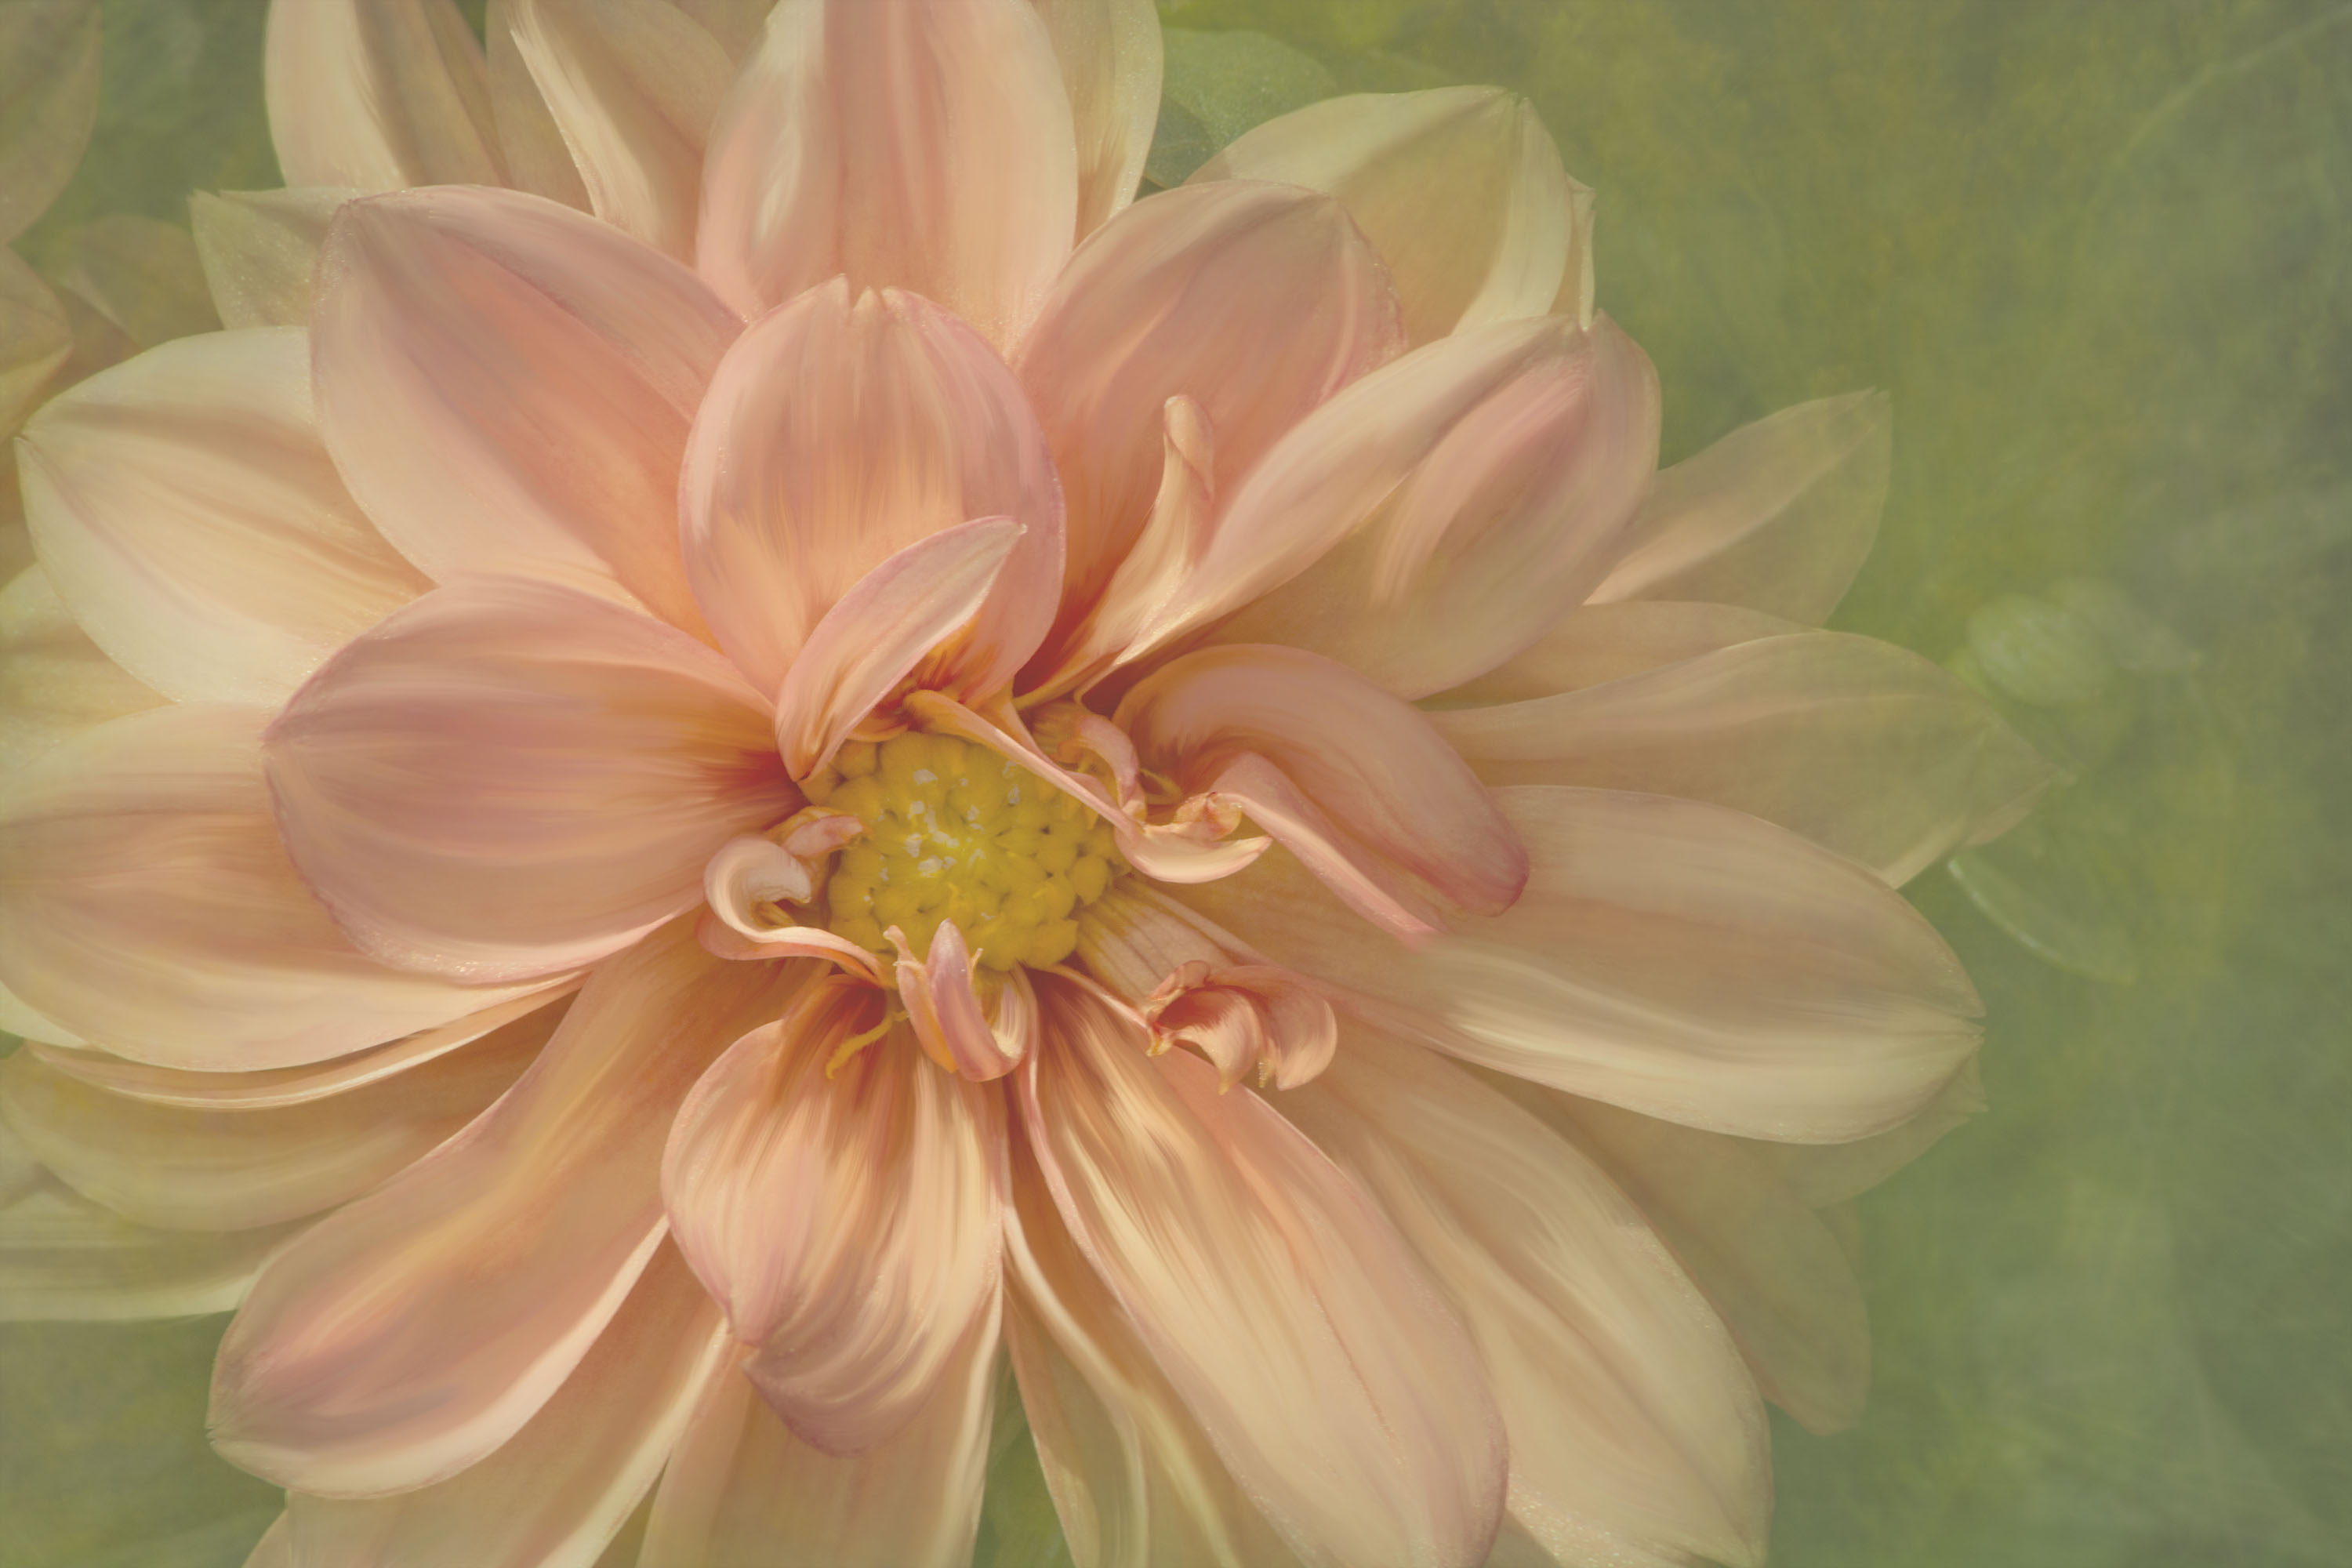
If you are like me the hardest part can often be figuring out when it is time to stop experimenting with your photos! This is my finished photo… For now.

Maybe I will crop some off the right?
Poppies for Memorial Day

Red poppies are worn on Memorial Day to honor people who have given their lives to protect the freedom of the citizens of the United States. Not only that, but the VFW sells the paper “Buddy Poppy” to help veterans and their widows, widowers and orphans. This tradition began with the inspiration from this poem written by Colonel John McCrae.

In Flanders Fields

In Flanders fields the poppies blow
Between the crosses, row on row,
That mark our place; and in the sky
The larks, still bravely singing, fly.
Scarce heard amid the guns below.

We are the dead. Short days ago
We lived, felt dawn, saw sunset glow,
Loved, and were loved, and now we lie
In Flanders fields.

Take up our quarrel with the foe:
To you from failing hands we throw
The torch; be yours to hold it high.
If ye break faith with us who die
We shall not sleep, though poppies grow
In Flanders fields.

For more details see this link to the US Department of Veterans Affairs.

This link to USMemorialDay.org credits Moina Michael as the first to wear and sell the poppy for remembrance. She also wrote a poem reply the above poem.

“We cherish too, the Poppy red
That grows on fields where valor led,
It seems to signal to the skies
That blood of heroes never dies.”

Today, on Memorial Day, take a break from the celebrations, cookouts and other festivities that we enjoy on this long weekend for the “National Moment of Remembrance.” At 3 PM, please observe this Moment of Remembrance and respect, by pausing from whatever you are doing for a moment of silence or listening to “Taps.”

Growing Poppies

To me poppies are very beautiful, delicate and intriguing flowers. Flowers are some of my favorite photography subjects too. My gardening skills aren’t great though. Luckily I know people who have an incredible green thumb and are gracious enough to let me wander aimlessly around their yard for a day trying to capture all the beauty that I see.

One of my neighbors enjoys gardening and camping, so she needs someone with special watering skills like me. HA! I can keep plants alive for 2-3 days – no problem.

Being Memorial Day weekend it is their first trip this year, so I got a special treat when I went into their back yard for the first time this season. My two small “hose assistants” wandered back there first and came back quickly to say “Mommy, it is BEAUTIFUL back there!” I was surprised by many more flowers than last year. Of course I wanted to just run back to my house and grab my camera, but I had a job to do first!

While I was watering I was thinking about how to capture all the different flowers and it seemed like I could have a pretty cool collection of images. Of course, I would also want to share those images with you here. Then my mind wandered to the other gardens I have been invited to photograph and it gave me a great idea to feature these gardens here. So look for those features coming up soon.

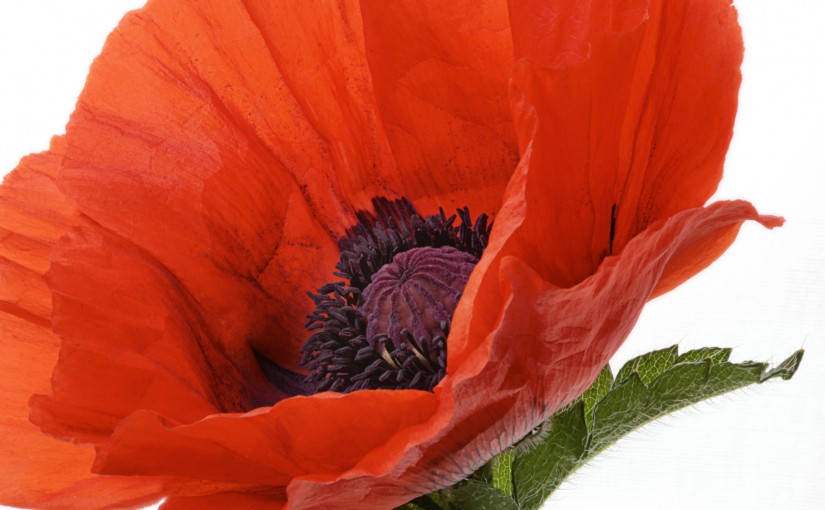
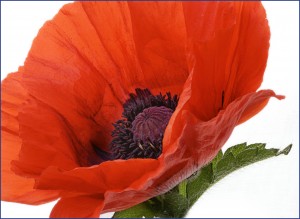
Back and forth I wandered with camera in-hand several times this weekend. For now, in honor of Memorial Day, I wanted to share one of her poppies. She has amazing poppies that grow in her front yard. I see the brilliant color from across the street. These things are the size of dinner plates! Really they are 7-8 INCHES across. I measured them. They always seem to bloom right around Memorial Day too. They are not red colored though, but I figured that was something I could
alter in Photoshop. Does it look convincing to you?

Poppies for Memorial Day 20160531My watering stipend was permission to cut one of those babies. When I asked, she knew my plan. “You are going to take pictures, aren’t you?” I wanted to get that flower inside out of the breeze and with lighting I could completely control. These are the things that excite me. The best part is she is also going to give me a seed pod so next year I will have some of my own! In fact, many of the flowers and plants in my yard were given to me by her.

Thank you, Marley for the inspiration that blooms every year. Happy Memorial Day to you all!

Remove Sticky Sticker Residue from Fabric FAST!

Stickers. Kids LOVE stickers, don’t they? Imagine folding laundry and finding that huge mass of sticker that went through the washer AND THE DRYER! What even is… Oh, right – the huge “My Name Is” sticker from the birthday party. Ugh.

Of course, it is great that my kids put their clothes in the hamper. Now we just need to work on checking pockets and looking for stickers stuck to shirts, pants, socks… (Yes, really socks. I don’t get it either.) Hey, a girl can dream, can’t she?

Anyway, thinking about how I remove sticky, sticker leftovers from plastic and glass made me cringe when I thought about trying it on fabric. After considering cutting my losses and tossing it right in the trash, I had an idea.

Rubbing Alcohol! I poured some on the spot and rubbed it with my finger and it just started rolling right off! That whole spot was gone in less than five minutes! You probably even have this stuff sitting in your medicine cabinet right now! If you don’t, it is super cheap, you can find it almost anywhere and I will share other ways you can use it soon. How exciting is that!?!

Ha. Maybe not for you. It is probably just a mom thing.Remove-sticker-residue

So, while I was working, I wondered if the printing ink or fabric color might be damaged by the rubbing alcohol. That’s a great time to think of it. Right? Luckily everything was fine. The beige colored snout of the bear became tacky as I worked, but when it dried it was back to normal. If you want to try this on something more valuable than a tiny novelty t-shirt, you will probably want to test an inconspicuous spot with the rubbing alcohol first.

My son is happy to have his silly BEARrito shirt back. And I am excited to have a new quick tip to solve a mom laundry problem that I can share with you!

Sign up for the email list with more tips and inspiration here:

Comment below with your sticky sticker leftover story!

Glass Photography: Dark Field Lighting


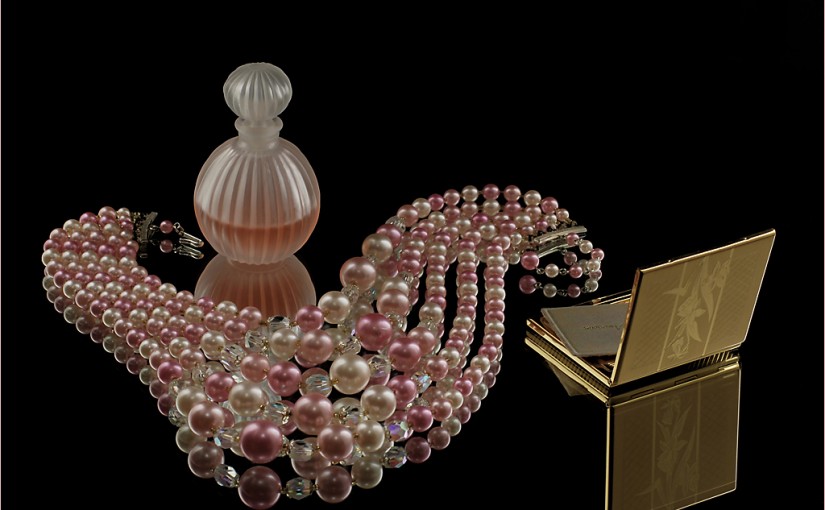
Glass Lighting techniques for Dark Field Photography "Hair Balsam"
In April 2016 I had the privilege of teaching my methods and tips for lighting glass items on a dark background to a full room of talented photographers at the CanAm Photo Expo in Buffalo, NY.

Thank you to everyone who was there to support me! Hopefully everyone learned something valuable as I shared how I create my images of glass on a black or dark background.

Why “Typical Cheryl?”

Later during the Expo when I shared the link to this blog, I was asked “How did you get that name?” It is a great question! I talk about that here.

Before starting this blog, I thought a lot about the topic. The first choice was photography. It is an interest and passion. It is challenging, exciting and I enjoy sharing what I discover with others who are interested. I share my work, ideas and information to hopefully inspire you to try it yourself.

Although I love photography, something was holding me back. The truth is, sometimes I find photography totally and completely FRUSTRATING!

Insight

Sometimes you (and I) just need to take a break from our passion, the activity we enjoy most, because we start to HATE it. Are you with me?

Taking breaks from photography was something I was doing. However, without the insight and understanding of why I needed to take a break, there was a lot of doubt. The inevitable slumps or projects that just wouldn’t work out the way I saw them in my head would cause me to question if I should just sell my camera and focus on being a better person… {sigh.} Dramatic enough?

Then I read this article by Elizabeth Gilbert on Oprah.com discussing the importance of Curiosities.

Now I see these “curiosities” as interests. These interests are the things that fill my days when I can’t (or don’t want to) work on my photography.  When these other interests or facets of my life go well, it makes everything easier. It gives me energy and enthusiasm to pick up my camera again. These are the other topics that are important to me.

  • Parenting: Don’t get me wrong. I am not saying I like photography more than my kids! I love my boys more than anything in this world. And sometimes the journey through our day is thoroughly exhausting. I think about their safety, future and whether I am doing everything I can to ensure they enjoy a long, healthy, responsible and successful life. I often study parenting techniques and philosophies to be the best Mommy possible.
  • Crochet: is something else I spend a lot of time doing and love the satisfaction of making things with my hands.
  • Recipes: Trying and finding new and delicious recipes is a part of my life everyday too. After all, we all need to eat!
  • Green Solutions: I also get (perhaps strangely) excited when I find new and better ways to clean or replace chemical cleaning concoctions with simpler, more “green” solutions.
  • Reading: Of course, reading is important when you are interested in learning!

I was really having a hard time choosing just one topic.

Then I realized there is one element that holds all these things together: creativity.

Creativity to find solutions. Creativity to try something new. Creativity to do things differently.

And that is why I decided I wanted to “Share Creativity” here.

Now I hope that makes sense to you – my fellow photographers!

Lighting Glass – Presentation Notes:

Glass Lighting techniques for Dark Field Photography "Orchid Light"For a recap of topic of my presentation you can see a couple of my other articles about lighting glass on a dark background for photography. One of the techniques I shared was my photo “stage.” In this technique I light my glass subject using underlighting from below the tabletop surface which takes a little extra care to direct the light into the subject without it spilling onto the background and tabletop.  We will also still define the edges of the glass with light. The times I have found this to be useful are when I am trying to light a fairly large or densely colored glass item. Another good reason to use this method is when there is a secondary subject (orchid) inside the glass subject (light bulb vase) that you will find out more about (including a diagram of the setup) in this article about how I created the image “Orchid Light v2” here.

There is also an article I wrote for Digital Photo Mentor (Darlene Hildebrandt) featuring glass lighting for photography techniques called “How to Photograph Glassware – DIY Studio Setup under $20” where you will see how to shoot glass on a dark field with a reflective tabletop surface including behind-the-scenes photos of the setup and several images created with that method including supplies and techniques. Read it here.

Many of the dark field glass images that I have created were part of a series for a photo essay. Each of the still images from that project are included in this short video from YouTube.

I am also working on screening useful, photography-related videos on YouTube and creating playlists. There is a lot of great (free) video tutorials out there, but it takes time to sort the truly useful from the rest. I have done some of the screening for you, so please visit and subscribe to my YouTube Channel to see the best of what I’ve found.

For further reading on the subject of lighting glass (or just about any subject) for photography, I highly recommend the book (find it on Amazon here) Light Science & Magic: An Introduction to Photographic Lighting written by Fil Hunter, Steven Biver and Paul Fuqua and published by Focal Press. Find more information about this book (and others) here.

Thank you!

While preparing for this presentation I discovered a few new pieces of gear to experiment with, thanks to Gary Farber with Hunt’s Photo and Video.  I will be sharing more detailed information about the Rogue Flash modifiers and the Savage Macro Art Adjustable Dual Arm LED Light in an upcoming post too.

Presenting in the Macro (and Close up photography) track gave me the great fortune to meet Lisa and Tom Cuchara who are very enthusiastic, energetic and generous with their knowledge and teaching approach. They present photography programs to clubs, organizations and conferences and teach camera and post-processing techniques (find out more here) and own a Portrait Studio http://www.breaphotos.com/ in Hamden, CT

Belczak-Cheryl-Dark-Field-GlassA special thank you to Mary Lou Frost who suggested my presentation be included in the 2016 CanAm Photo Expo and Doug Hansgate, the Convention Chairman who gave me the opportunity to be part of this awesome event. Thank you also to Robert Carey and Dave Valvo who kindly captured and shared photos for me during the presentation!

I will be presenting this program again at The Am-Center Camera Club and possibly a few more dates and places too. I will let you know when the details have been finalized. Please leave a comment below if you have any questions about the presentation or would like to schedule a presentation for your organization.

Thank you for stopping by! Sign up for my email list here:

Bedside Books for Reading Therapy

Do you do this? I always have a pile of books next to my bed. This is what is there right now. Since I started writing here my intention has been to share more of the books I love with you. However it usually takes me longer than it seems like it should to get through a book. There are just so many responsibilities, muses and interests that take priority.

Oh, and there is a stack. Usually I don’t read through just one before I move on either. Evening reading is often based on my day. Struggling with the kids’ behavior pushes me to pick up the parenting book.  If I am trying to work out a plan for a photography project then I choose a technical photography book. A total lack of creative motivation or a surge of inspiration drives me to a book that will push me creatively.

Then there is the fact that if I don’t write about a book as soon as I finish it I feel like I need to re-read it to write about it. Right now, my reaction to finishing a book that I learned a lot from or have been moved by is to just sit, think and soak it in. Then life rushes in, time passes by and after that I feel like I have to immerse myself in that book again to tell you precisely why I felt it was so powerful…

This sounds like a never-ending cycle, doesn’t it? So sharing this with you is helping to reprogram my reaction and enlist you to keep me engaged and motivated to finish these great books. Thank you!

So for now I will share my reactions to these books as I read them and what has earned them a spot (and kept them there) on my nightstand.

Starting at the bottom is Light Science & Magic: An Introduction to Photographic Lighting written by Fil Hunter, Steven Biver and Paul Fuqua and published by Focal Press. I have the Fourth Edition, but there is a newer edition now available.

If you are interested in photography and want to get serious about creating better images this book is an awesome investment of your time and energy.  The principles of understanding and crafting light in your photos are fully explained with diagrams and photographs of both successful and unsuccessful examples. Working through this book will dramatically improve your photography. Yes, it is about light, but it is not “light reading” and as I mentioned that best way to fully understand the concepts in the book is to shoot intentionally in attempt to recreate the presented material. It is a highly regarded book that is often used as a text book and is great as a self-study guide. I used this book as I learned how to light glass for photography and developed my DIY home studio method that I talked about in this article for Digital Photo Mentor.

Big Magic: Creative Living Beyond Fear by Elizabeth Gilbert (yes, the author who wrote Eat, Pray, Love)

This book is about the creative process, embracing it, enjoying it and surviving it! When it was released our local library system got about 40 copies! They were anticipating best seller status with their initial order and all copies were all checked out immediately! There was excitement about this book from the start. I got my hands on one of the copies from the library, read a little – and stalled out. I don’t know why, but I think it was my own frame of mind at the time. Even thought I knew there was a waiting list and I would not be able to renew it, I couldn’t push myself to get very far. Luckily for me, I was given a copy as a Christmas gift. When I finally did pick it up again, I couldn’t get enough. There were a few late nights soaking up every word because I just didn’t want to put it down. Now this is one of those books (like this one) that I am so excited and inspired by that as soon as I finish that last page, I flip to the first page and start reading it again!

If I Have to Tell You One More Time…: The Revolutionary Program That Gets Your Kids To Listen Without Nagging, Reminding, or Yelling by Amy McCready

Just the title says a lot, doesn’t it? It sounds divine. Ahh, yes I was daydreaming of it just now. Again.  So, the principles in this book are based on the ideas of Alfred Adler (Alderian Psychology) that simply states “Children deserve dignity and respect.” “Three of Adler’s principles developed from this belief will influence all the strategies in this book.” (Read the book to find out the three principles.)

I appreciate this approach because I want my boys to grow up knowing they deserve dignity and respect. If they don’t get it as children, when will be the magic time that they feel they deserve it? I certainly don’t want them demanding it with rebellion. However, even with the best intentions, there are days when we are tired or stressed or overwhelmed and not sure what to do next. This book offers real life examples of how to examine our children’s behavior (as well as our own) and how those behaviors play together. We learn how we can be a positive influence on our children and develop a deep, meaningful, trusting, caring and close relationship with them leading to all the wonderful day-to-day benefits in the title. My bookmark was about ¾ of the way through from the last time it was on the nightstand when I felt that situations and scenarios were warranting that I brush it off and start again. While I’m reading now I found this quote on page 56 that explains my feelings as I instinctively reach for this (and other parenting books) in the first place. It is something I’ve felt, but hadn’t tried to communicate. “…as responsible parents we need to continually strive to improve on our own parenting style.” Yes! Thank you, Amy McCready. By the way, that sentence starts with “Of course, we all make mistakes, but…

Daily Peace: 365 Days of Renewal by National Geographic

This little hardcover book is a great gift for a friend or yourself. It features beautiful photography and thoughtful quotes each day to inspire your own “Daily Peace.” The book is published by National Geographic so you know it is top quality. It is difficult to choose just one quote from this book so I looked at meaningful dates for me and I found this one to be the most powerful. I will leave you with this quote since it is a perfect thought for when you are snuggled in bed, with your books back on the nightstand and the light off. “How noble and good everyone could be if, every evening before falling asleep, they were to recall to their minds the events of the whole day and consider exactly what has been good and bad. Then without realizing it, you try to improve yourself at the start of each new day.” –Anne Frank

Spring Nesting!

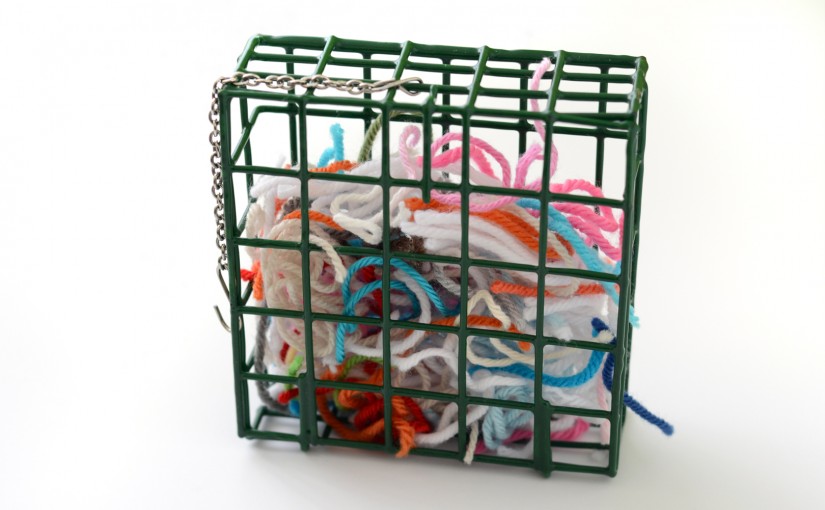
At school one day my son became very excited to show me something. We were outside the building and he told me it was something he made. I was confused. Then he led me to a tree and showed me a re-purposed citrus mesh bag filled with yarn scraps. He explained that it was for birds to use for their nests and said he really liked doing something nice to help the birds. Isn’t he sweet?

Crocheting was a new hobby for me then and I figured that would be a great way to put the short yarn ends to use, but sometimes my intentions are better than my follow through. Please tell me you can relate. 🙂

Then I found this adorable Etsy listing that reminded me that my boys and I want to help our little bird friends find nesting materials and beautify our neighborhood bird nests, but we never actually hung one in our yard.

After wooing a friend into the addicting world of crochet, this idea came up again and I shared that cute little Etsy listing I had pinned as a reminder. If I hadn’t done that this would still just be another one of those great ideas I found and saved on Pinterest. {sigh}

Instead, she gave me this suet cage as a thoughtful Christmas crochet-buddy gift!

So now that spring is officially here it seems a little like I should have more scraps saved than this. Dare I say I have been a crochet slacker?

If you would like to do this too just make sure your ends are between 4 and 8 inches long.

Sarah from Repeat Crafter Me made a variation on this too. It looks like she does a LOT more crocheting than me! Ha! I love her patterns and have made several of them, but WOW! I can’t even imagine how she gets that much crocheting finished. Plus she is creating the patterns! That is talent. Check out her yarn scrap recycling post here.

Happy Spring!

Welcome OYS Friends!

Hello and welcome! You probably just found me through a link from Organize Organize Yourself Skinny 5 Strategies ebookYourself Skinny! I am excited to have recently become a regular team member at OrganizeYourselfSkinny.com! I was lucky enough to meet Tammy Kresge a little over a year ago. Soon after, I had the privilege of working with her to layout her ebook and create the image featured on the cover.  Now I help with managing some of the social media communication. I will also be helping with photography related projects, but I can’t confirm or deny if there will be more ebooks on the way…

Tammy also inspired me to push forward with an idea I had been kicking around for awhile.  I wanted to start my own blog. (Here you are!) She helped me clarify my ideas and gave me the gentle kick-in-the-pants I needed to get started. If you want to learn a bit more about me and what to expect here, please check out my About Cheryl page. A post that Tammy has on her site made me realize that the potential I believed a blog could have was really possible. I have discovered that it is not easy. There is a lot of work involved in making it happen and I find that challenge exciting!

While looking at all the delicious recipes on OrganizeYourselfSkinny.com I keep finding ones I have to try! My little boys and husband have liked every one!

So far we have tried Buffalo Mac and Cheese, Crock Pot Sausage and Peppers , Stuffed Pepper Soup (I used the leftovers from the Crock Pot Sausage and Peppers in it too) , Broccoli and Quinoa, Chicken Parmesan Casserole  and Turkey Taco Meatloaf.

Basically I just have to tell the kids “this is Mrs. Tammy’s recipe” and they kind of already love it – before the even try it! It is just the magic I need sometimes!

I have also started making Overnight Oats more often (we loved the chocolate banana recipe). I even devised a pretty delicious Chocolate Raspberry Overnight Oats recipe myself. They make mornings so much easier because I have a filling, healthy and yummy breakfast ready for my kids and me as soon as I wake up.

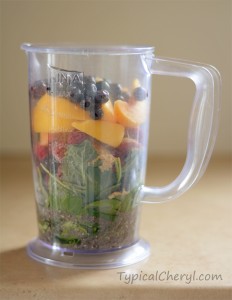
Banana, peach, mixed berry green smoothie recipe
Can you spot which ingredient I forgot while taking these photos?

We have also been enjoying a lot more green smoothies. I have my own “recipe” and even though I’ve found so many others that sound good I just always go for this one. I don’t measure (Okay, I did just this once so I could share it with you – it is my way of showing you how happy I am to have you here!) and sometimes I run out of one thing or another so it doesn’t always taste exactly the same, but it is always delicious. This is what I use (and I layer it in this order – it seems to make a difference with how easily it blends up):

1 Tablespoon Chia seeds
Soak Chia seeds in 1 cup of water
1 cup spinach
1 cup kale
I use  frozen fruit for convenience and to give the smoothie the cold, thick consistency
½ cup frozen strawberries
½ cup frozen mango or peaches
¼ cup frozen raspberries
¼ cup frozen blueberries
1 banana
1 TBSP flax meal

Banana-peach-mixed-berry-green-smootie-recipeUsing an immersion blender (like these) I blend it up and add more water if it is too thick. That is it! I drink about 14 oz and split the rest between my two boys. I have been known to make a bit more than we really want at one time and I have found (at Tammy’s suggestion) that it will keep well in the refrigerator. The texture does change a little, but it still tastes great. I think the flax meal and chia seeds help keep the texture pretty thick, which I like. I can’t tell you how long you can safely keep it because ours never last more than a day before it disappears!

I add a lot of greens and you can NOT taste them. You can see green specks, but the overall color is not green. We enjoy knowing we are drinking something really good for us that tastes great too. It is an awesome way for us to amp up our fruit and veggie intake. Everything Tammy says in this article, I say ditto.

Although I am not trying to lose weight, I am always trying to eat better, exercise more, drink more water and teach my children to eat a healthy variety of minimally processed foods. Working with Tammy and reading her posts are inspiring to me to create better habits. Her strategies for meal prep, make ahead meals, meal planning and incorporating exercise into every day are incredible tools for everyone to make it easier to eat healthy while taking some of the hectic rushing out of your day.

Thank you for visiting me today at TypicalCheryl.com. Find me on Pinterest, Instagram, Facebook and Twitter. Please look around, come back again and sign up for my email list!

Simple Crochet Wrap – Free Pattern

This is a versatile wrap that can be cozy and casual or a little sophisticated and stylish without being fussy or frilly. The open stitch pattern creates a monochromatic striped look and keeps it from being overly heavy or bulky. The light sport weight yarn used here (see previous post) is soft, a greSimple Crochet Wrap - Free Pattern from TypicalCheryl.com. Simple even for beginners. Wear it three ways.at neutral color (it seems to coordinate with any other color) as well as being machine washable and dryable. The finished wrap is lightweight and can be worn three different ways making it flexible enough to wear it for a casual autumn walk in the leaves, a springtime brunch, a summer night out or even an extra snuggly winter layer to stay warm at home or in the office.

The pattern is simple, so someone who is at a beginner level in crochet can do it. Also, after the chain and foundation row, it just repeats continuously to create a long rectangle so you can work on it whenever or wherever even if you don’t have access to the pattern. You will get into a groove and be amazed at how fast you will whip it up. It is easy to work on while watching TV or chatting with your crochet buddies.  Add something special to your wardrobe or make a great gift for a friend or relative. Let’s get started!

Feel free to sell items you make with this pattern and please include a link to this page. I appreciate you spreading the word and sharing the love!Simple Crochet Wrap - Free Pattern from TypicalCheryl.com. Simple even for beginners. Wear it three ways.

Materials

Sport weight yarn

US H/ 5 MM Crochet Hook

US J/ 6 MM Crochet Hook (to make the starting chain with a looser tension)

Coordinating thread for sewing on buttons

Buttons (I used two 7/8” buttons)

Special Stitch

2 DC Cluster stitch: Yarn Over (YO) insert hook in chain 1 space from previous row, YO and pull through two loops (2 loops remain on the hook), YO insert hook in the same chain 1 space YO and pull through two loops on the hook again (3 loops remain), YO and pull through all three remaining loops on the hook.

Chain 78 (I use a hook two sizes larger for my chain so the starting edge will not be tighter than the rest of the piece – for the chain here I used a US J/ 6 MM hook) The chain length will be the length of the wrap from the shoulder to the waist. The model here is 5’7”. Adjust the starting chain based on your desired length or the height of the person who will wear it. The starting chain needs to be a multiple of 2.

Row 1: Switch to US H/ 5 MM hook and DC in the third chain from the hook, chain 1 and skip one chain and DC in the next. Continue across the starting chain with a *DC, chain 1, skip one of the starting chains* and repeat until one chain remains. Place a DC in the last chain.

Row 2: Chain 3, turn and place a cluster stitch in the first chain 1 space then chain 1, *cluster stitch in the next chain 1 space, chain 1*. Repeat across and place one DC in the single DC from the previous row.

Row 3: Chain 2, turn and DC in the first chain 1 space, chain 1, *DC in the next chain 1 space from the previous row, chain 1*, repeat until the last chain 1 space. Place two DC in the last Ch 1 space.

Repeat Row 2 then Row 3 until you have reached your desired length. There are 111 rows in the wrap shown here.

Once you have reached your desired length, chain 1 and single crochet Simple Crochet Wrap - Free Pattern from TypicalCheryl.com. Simple even for beginners. Wear it three ways.(SC) in every stitch or chain on the short edge, place 2 SC in the corner. On the long edge place 2 SC at the end of every row (you will be working around a chain or a DC and it will alternate). Repeat until you have completed all four sides of the wrap.

Chain 1 and SC in every stitch.

When you finish this step you will have two rows of SC edging around the entire wrap. You could stop here, weave in your ends, and use it as a large scarf style wrap. If you continue and add buttons you’ll get the added versatility of different ways to wear this multipurpose accessory.

At this point you will complete the wrap by only working along one of the long edges and this will be the top collar edge of the wrap where you will place the buttons and button holes.

Simple Crochet Wrap - Free Pattern from TypicalCheryl.com. Simple even for beginners. Wear it three ways.
This is how I hold the wrap to determine where to place the buttons as detailed here. –>

Before the next step you need to choose where to place the buttons and holes. Fold the wrap in half. I placed that folded edge on my shoulder and held the wrap together at a comfortable spot under my arm where it seemed like a good spot for the first button to be if I were wearing it on only one shoulder. For me this was about 5 inches below my underarm. The same spot where the bottom edge of my bra sits. When I wear the buttons on my shoulder this placement of the button holes adds a flattering drape to the collar edge. There is a V-shaped collar with buttons worn in front. Mark this meeting point in the two spots along the edge. Use stitch markers or bobby pins. One marker indicates where you want to sew on the button, the other is where you will make the button hole. For me this spot was 14 inches from the folded edge for the first button and 17 inches from the fold for the second one. My buttons are 7/8” and skipping two chains to create the button hole was a good size. If your buttons are smaller or larger you will have to adjust the size of the button hole you create. You could customize the wrap by using more or different size buttons.

Chain 1 SC in every stitch until you reach your stitch markers, *chain 2 and skip two stitches where you will be placing your button hole*, SC until you reach the second stitch marker and repeat between the asterisks(*). Finish the row by SC in every stitch.

Chain 1, turn, SC in every SC, place two SC in the chain spaces for each of the button holes.

Chain 1, turn, SC in each stitch along the top and continue around the entire piece. This will add a finished edge on the ends of the additional rows added to the top. Fasten off, weave in ends and sew on your buttons.

Enjoy your new wrap!

Special thanks to my good friend and crochet buddy, Andrea Tasevski of morganstreetdesigns.com, who tested the pattern for me. I am quite amazed by how fast she can whip these things up!

If you have any questions or need clarification please leave a comment below. I would love to see your finished project too.

Sign up for my email list here:

How Did I Get Here?

This is the first photo in a self portrait personal photography project I just started.

Before it was completed I shared it with my (almost 7 year old) son and began discussing it. Yes, we discuss photography often. In fact we love having ChromeCast scroll through images and we talk about them. He has been able to identify images created with a slow shutter speed and say how he can tell for a couple of years!

Back to the point though, as I talked about how I created the sky and water scene then I continued saying “I placed the rock there…” and he said “So you wonder – How did they get there?” (Gasp!) This amazing little guy understands me and my thought processes completely!

The inspiration to try something like this came from the wildly enchanting, surreal and magical images of Josh Adamski.  You can see his work on Facebook , Instagram or on his website here. Also, I am beginning to work on an “Inspiring People” series where I am sure he will be featured. Although (I think) I figured out the premise behind his methods, my attempt at the technique fell far short of the beauty he creates. This experience has once again “shown me how I can soak up their [other artists’] work, digest it and let it flow back out of my mind and hands in altered way that makes it mine.” Find out more about the book that brought me to that realization here.

I attempted this image to complete a photography challenge using a “Creative” technique. Before I added the white drawings it seemed to lack something. The path to adding the drawings started because my entry was to be shown projected on a black background and I thought it would be interesting if the edges weren’t just straight. So I began creating some elements in Adobe Illustrator. As I worked, the vector graphics grew and dominated the image. For me it changed the message of this image. My original title (without the white graphics) was “Future” where it seemed that we were looking at that person in an open vastness looking forward to a future of opportunity. Now the title is “Dream Your World” and I feel it makes that little person much less passive and gives her the power and control to create the world where she wants to live.

So, how did I get here? I have always enjoyed making, creating and sharing ideas. In college I studied Marketing and Advertising and began my career copywriting. Working with Graphic Designers lured me to try my hand at that side of the creative marketing process. Later, as a stay at home mom I began to explore my interest in photography. Now that my youngest child is almost old enough to be in school for a full day I am searching for a way to be able to financially contribute to supporting my family while still being home on sick days, snow days, school vacations and during the summer. I am working to create my own work-from-home, “sharing creativity” dream world. I truly appreciate your interest and support here at TypicalCheryl.com.

Please take a moment to leave a comment below and sign up for my email list here. I look forward to sharing creativity with you!

A Simple, Soft, Chunky Crochet Blanket

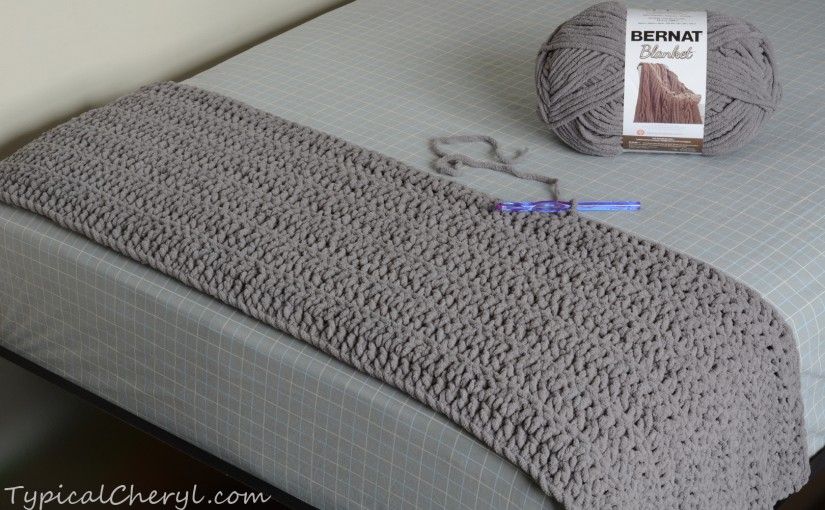
This is a fast and easy blanket to crochet. So you decide to make it. Then you wonder “How much yarn do I need?” That question could be the most complicated thing about making this blanket! Thankfully we can simplify things by looking at this WIP (work in progress) for a reference of how big the project will be with one ball of this incredibly soft and squishy, super bulky (6 gauge) weight yarn called Bernat Blanket yarn.

Normally figuring out how much yarn to buy for any project depends on MANY variables. Yarn thickness, hook size, stitch pattern, finished project size and more are all factors. So when I decided to crochet a blanket with this yarn for the first time I realized… I had no clue! Would 2 balls be enough? Or do I need 10? Of course, sometimes you just want to know how much money you are going to spend on the project before you get started.  Hopefully this will be helpful.

This yarn is 100% polyester and reminds me of a strand fleece material. It is also machine washable and dryable with delicate and low heat settings recommended.

Crochet Bernat Blanket - one skein finished on a twin size bedThe beginning of this blanket is shown on a twin size mattress. It measures 50 inches in width and 12 inches in height for 12 rows. (I made it less than half way on row 13 so it is not counted in the height.) In order to make a blanket that is 6 foot tall (my goal) you will need 6 balls. This is for the 10.5 oz / 300 g size skein that is approximately 258 yards or 234 m. It is pretty awesome that the math is so simple on this!

Note: the Bernat Baby Blanket yarn is the same weight, but the there is only about 72 yards in a ball, so if you would like to use a color that is only available in the Baby Blanket yarn you will need 3 times as many skeins. As described above that would be 18 balls of Bernat Baby Blanket yarn.

This would be a great project for anyone – even a crochet beginner who is just learning. It will make an impressive completed project to share too. Give it as a gift or snuggle up in it yourself. It is pretty irresistible! You can easily work on it while you watch TV because it is repetitive and works up quite fast with a large hook (9.0 MM/US M-13 hook) and this super bulky yarn. After a while it can even keep you warm as you work! 🙂 It is so simple there is no pattern needed! If you want to make one like this, the details are below.

Materials:
Bernat Blanket Yarn (Dark Gray seen here) 6 Balls for a 50 inch by 72 inch blanket to cover a twin size bed
9.0 MM/US M hook
Tapestry Needle to weave in ends

Gauge:
The dimensions I give to approximate yarn needs are based on 7 stitches and 4 rows equaling 4” x 4”

Method: (Too simple to be called a pattern in US Crochet terms)

Chain 88

Turn. Begin in the third chain from the hook double crochet (DC) across.

Chain 2 counts as first DC.

Warning! Do not place a stitch in the first stitch from the previous row or your edges will not be straight. Can you guess how I know? How many rows do you think I had to pull out to fix this? Now you won’t need to!

Back loop crochetDC in the remaining stitches working in the back loop only. Working in the back loop creates the line detail between rows. If you prefer, you can work in both loops for a more traditional DC look instead. See the photos for clarification of where to place your stitch if you want to work in the back loop and a visual comparison so you can see the difference between these two different ways of working this blanket with this yarn.Blanket comp swatch

You will work this blanket horizontally, so continue until you reach your desired length.
Right now I am planning to also add a single crochet border around the entire blanket to finish it.
Hopefully this will be a warm, cozy, usable keepsake gift for my son when it is done. It has a current, chunky, subtle boyish (or manly) style. It is also super soft! The decision I have to make now is whether I should change colors so the finished blanket has thick stripes or keep it monochromatic. To make stripes I will pull out the partial row and start a new color with a new row. Let me know what you think in the comments below.

Join my email list for more, tips, tricks, projects and inspiration.